4 Drills for Fence Installation
Which Should You Choose?
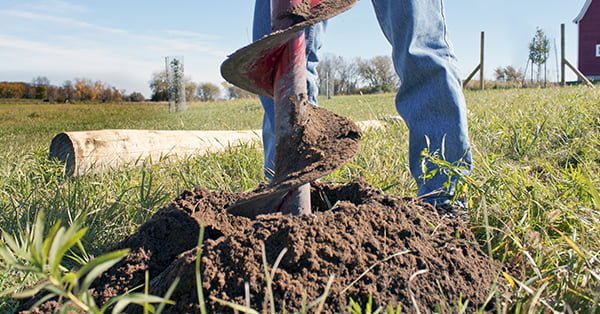
With all the earth drills on the market that are capable of installing a fence, how do you sort through the options to find the best drill for your specific needs? Little Beaver offers multiple options that appeal to fencers looking for the labor-saving benefits of safe, one-man drilling. While any drill may do the trick, different drills have different strengths depending on the job, and a drill that consistently gives you great performance can help you land more jobs and increase your profitability. Here’s a breakdown of our most popular options for fencing and the jobs they’re best suited for:
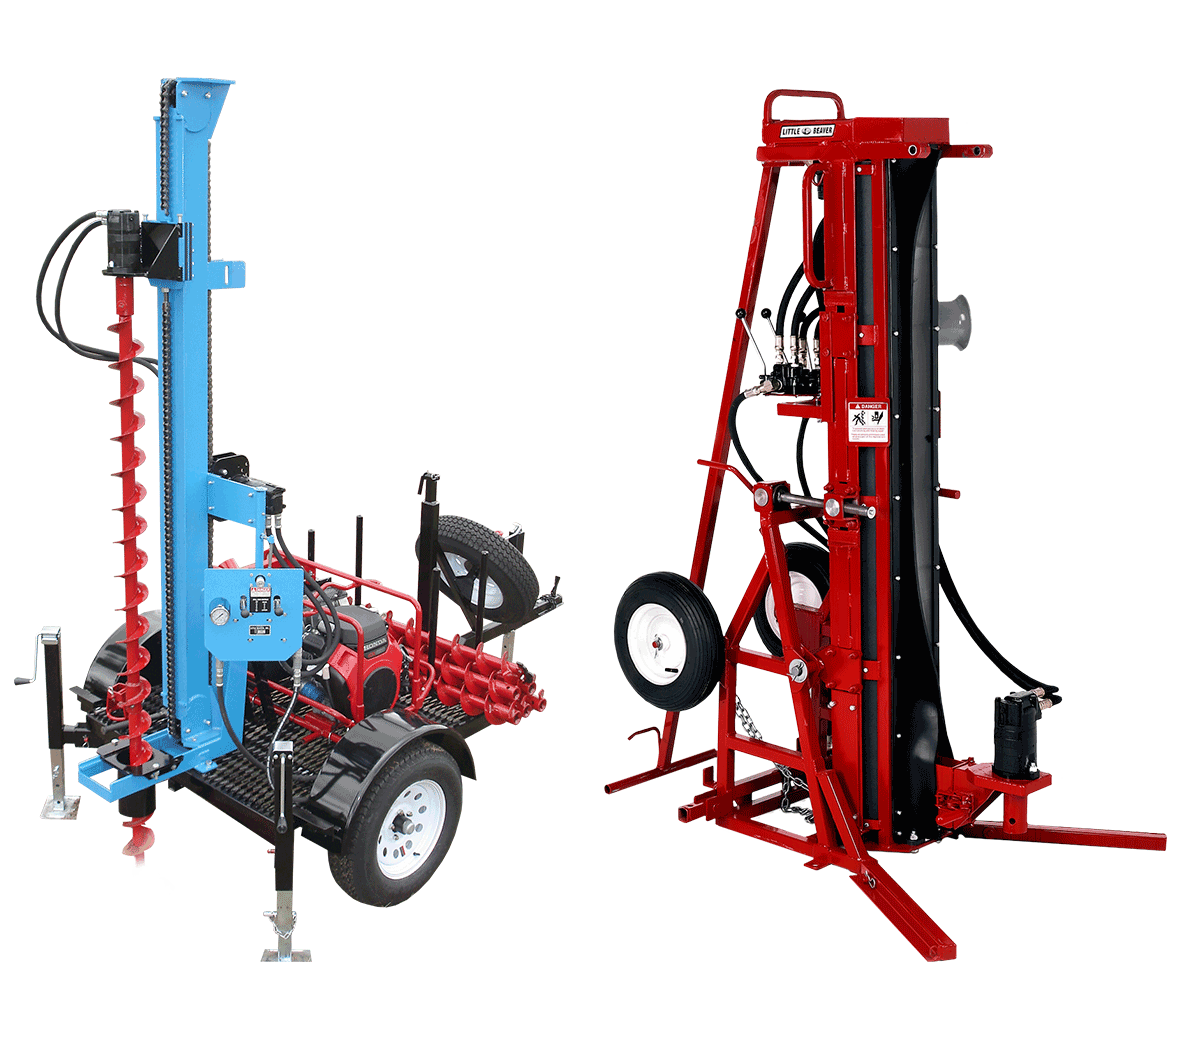
Mechanical Earth Drill
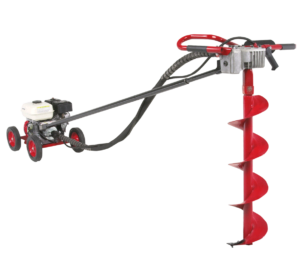 If the majority of your jobs require speedy, one-man drilling, look to our mechanical earth drill series.
Little Beaver mechanical earth drills combine a compact, lightweight design with unbeatable speed and precision. These transmission-equipped units feature high-speed auger rotations and excel in situations requiring numerous posts in very little time. And with optional 13:1 or 20:1 gear ratios, they can take on everything from soft soils to dense, rockier applications.
If you’re looking for more ways to expand your business, Little Beaver mechanical earth drills are compatible with horizontal boring kits, enabling expansion into landscape lighting installation and running sprinkler lines or cable under driveways and sidewalks.
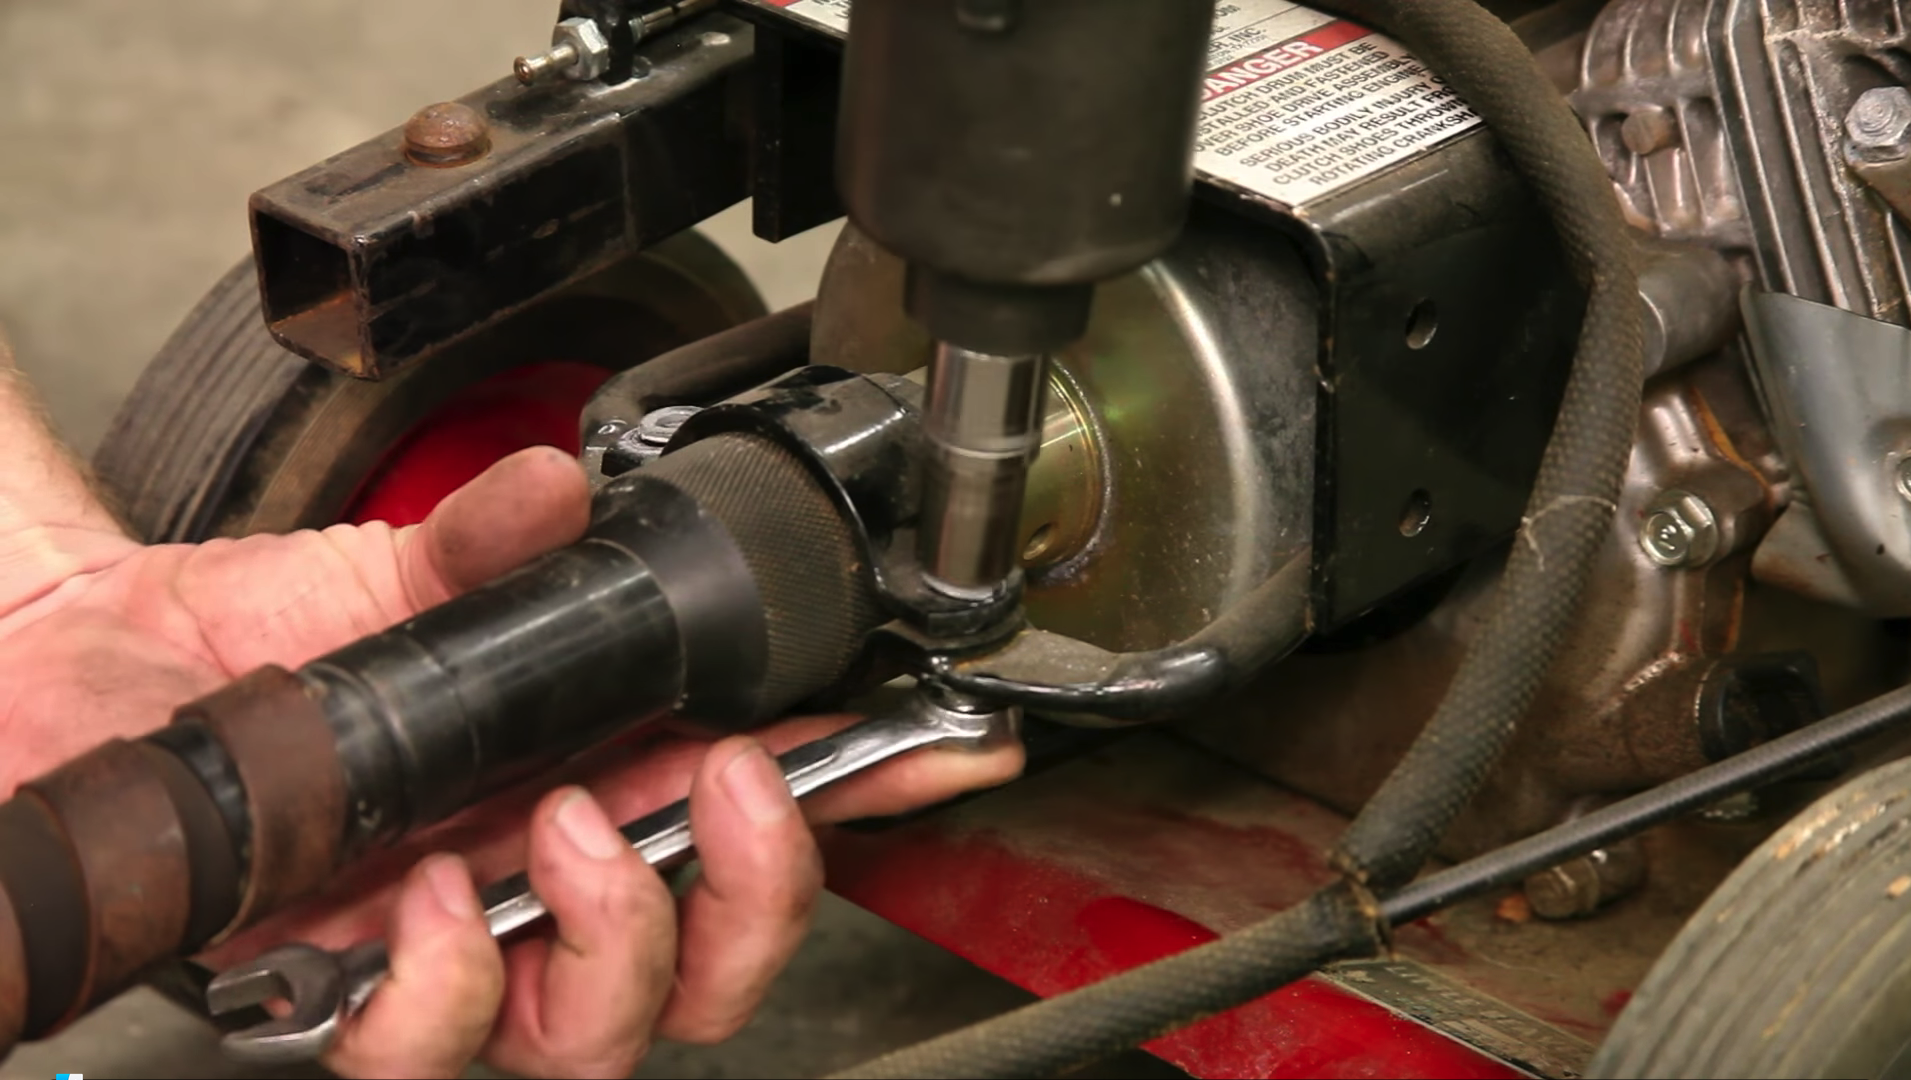
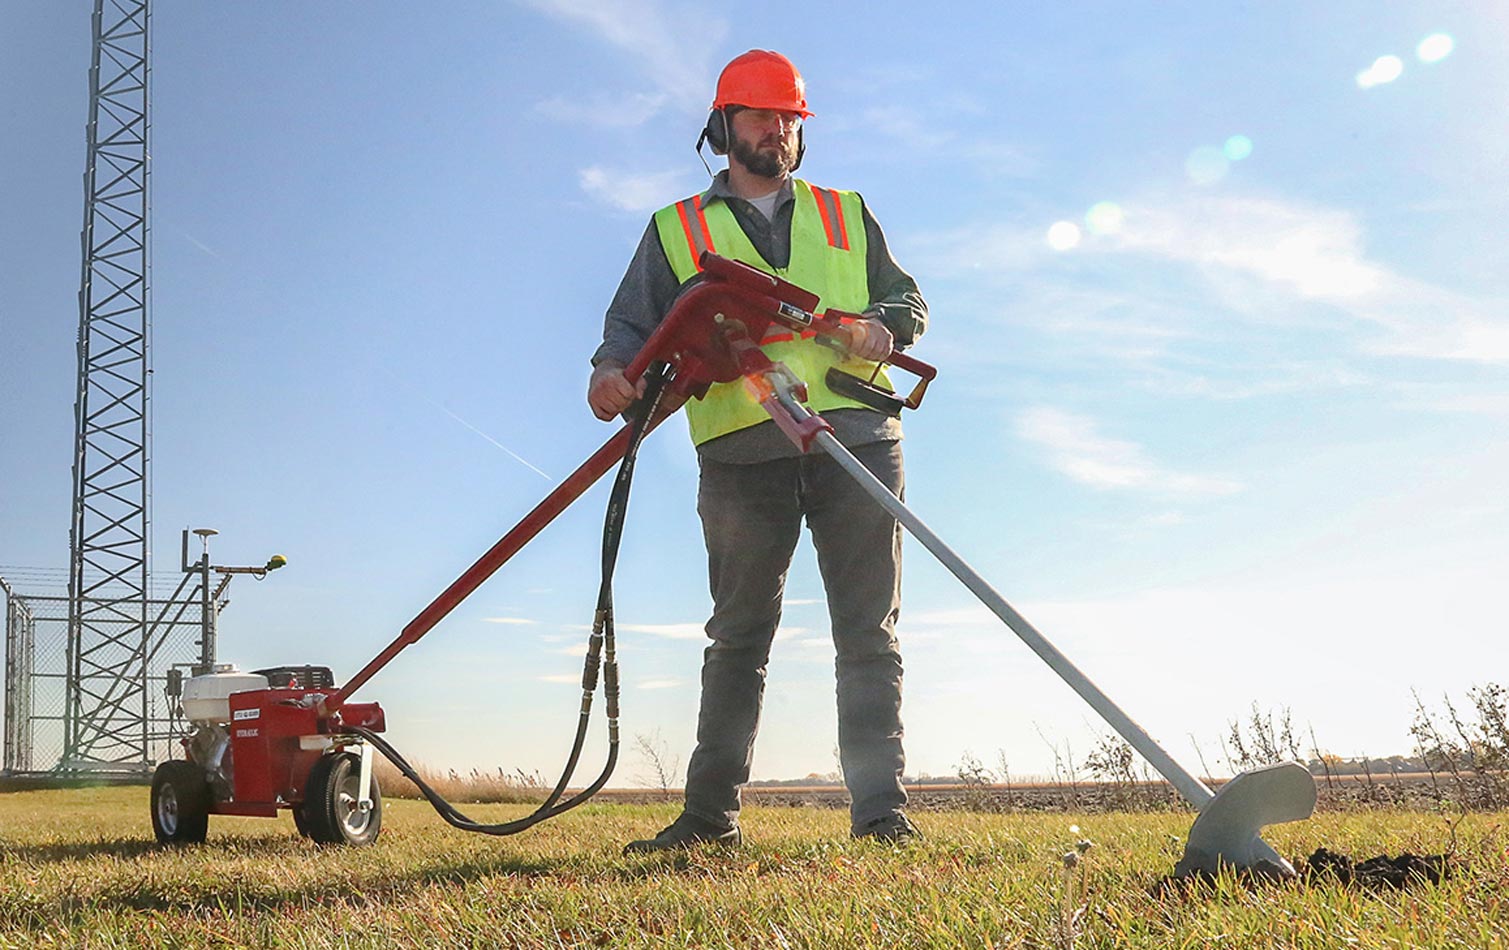
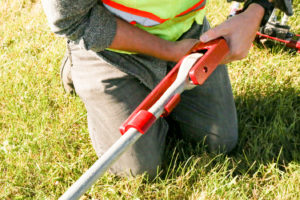
A centrifugal clutch and torque tube truly enables safe, efficient one-man drilling, eliminating dangerous operator kickback and preventing jarring stops when an obstacle is encountered. Additionally, the innovative torque tube redirects torque kickback to the engine carriage instead of the drill’s handles. Other brands of drills reduce performance to accommodate one-man hole digging. But not Little Beaver. We feature all of the power without the inherent risks of other drills.
Hydraulic Earth Drill
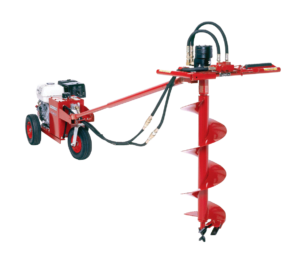 Despite all the advantages of mechanical earth drills, a season full of drilling a large auger through hard packed clay and soft rock formations may leave mechanical drill owners envying their hydraulic-equipped competitors.
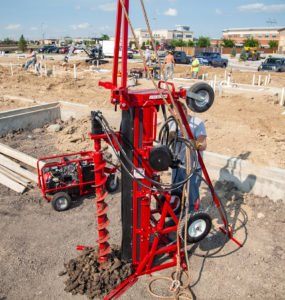
Hydraulic earth drills are your go-to drill for the most challenging soils because of their rugged bodies and powerful torque. Their high torque and precise operation at low speeds allows operators to drill clean, accurate holes, even in the most difficult applications. Hydraulic drills are ideal for drilling wide holes because they have the torque to drive large-diameter augers — some as wide as 16 inches — making them perfect for installing large fence posts, gate posts and any large-scale decorative fencing. Additionally, our hydraulic earth drills have a reverse position so you can safely back-out the auger if it becomes lodged under a rock or tree root.
While hydraulic drills don’t have a clutch to worry about, the operator could be at even greater risk of injury due to the large amounts of torque from these drills. This is where our torque tube is more important than ever as it allows a single operator to safely handle high levels of torque that would be an unthinkable risk with any other design.
Towable
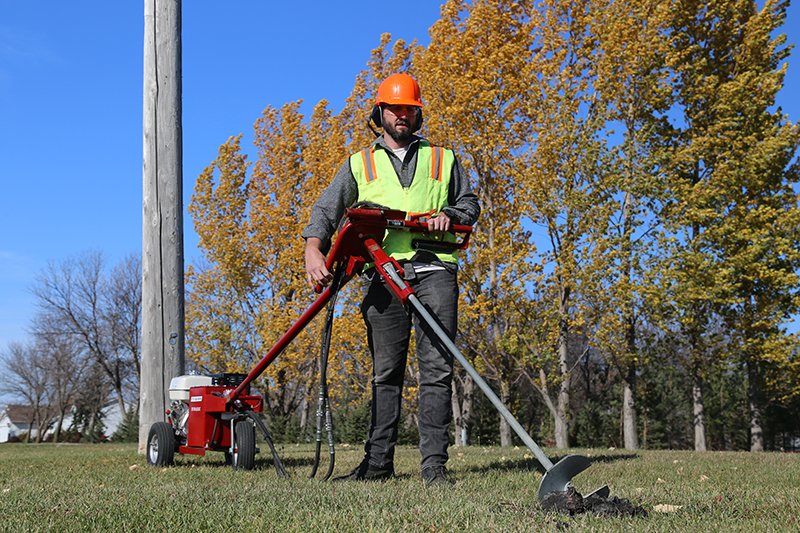
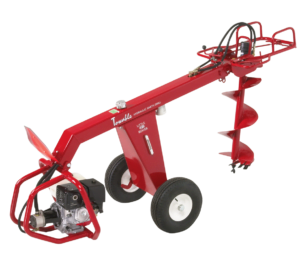 Do the advantages of our hydraulic earth drills sound appealing for your fencing crew, but you need easier maneuverability and transportation while still maintaining high torque? If so, look no further than our Towable Hydraulic Earth Drill.
Our Towable drill consists of a T-shaped steel frame with highway-rated tires in the center, an 11-horsepower Honda engine located on one end and the auger and controls on the other. The frame balances the weight of the drill over the wheels, making it easy for one person to move, pivot into place and manage when drilling. The wide tires also prevent damage to delicate turf or landscapes.
The design reduces operating weight by roughly 50% compared to traditional hydraulic drills, and it requires less than 20 pounds of force to pivot into digging position. The frame also eliminates torque for safe one-person drilling. The rig can be conveniently towed using a removable “no tools” towing hitch, saving valuable truck or trailer space and making it an economical tool for fencing contractors of any size.
UN-Towable
 If the maneuverability of the Towable is just what your fencing operation needs but you require more transportation options and a lighter package, our UN-Towable Hydraulic Earth Drill is the workhorse you’re looking for.
Like the Towable, our UN-Towable operates with a balanced design that makes maneuvering and operation a breeze, but it comes in a smaller package with greater transportability and still achieves drilling specs similar to that of the Towable.
Unlike the Towable, which must be towed behind a truck or loaded onto a trailer, the UN-Towable can be easily moved to the jobsite in the back of a pickup truck or SUV. Alternatively, an optional slide-in receiver hitch offers an additional transportation method. The user-friendly E-Z load bracket is designed to fit in any two-inch receiver, commonly found on most pickup trucks and SUVs. Simply secure the unit in the hitch, crank up the machine until it stops, and insert the pin to lock it in place. This allows fencing crews to carry more and do more without worrying about transportation logistics or expanding their fleet.
Additionally, smaller fencing crews or those needing more flexible transportation will benefit from the UN-Towable’s removable power pack. By detaching the power pack, the overall weight of the drill is reduced by 50%, allowing the machine to be easily transported in two parts.
Fencing can be tough work; don’t make it harder with an ill-suited drill. Consider your crew’s size, typical jobs and future needs to pick a drill that will help you excel at jobs today and give you a greater return on your investment down the road.


 Ensuring accurate and consistent sample depth can be done


 If you’ve got backup drills in your fleet, waiting for a repair might not be an issue. But for contractors who rely on the unit on a daily or even weekly basis, being without it could result in lost revenue. In the summer, especially, many local lawn and garden repair shops are backed up for 6-12 weeks, which is not a feasible wait time for many people. Depending on how long you’ve owned the machine and what industry you’re in, the decision to repair or replace might make more sense.
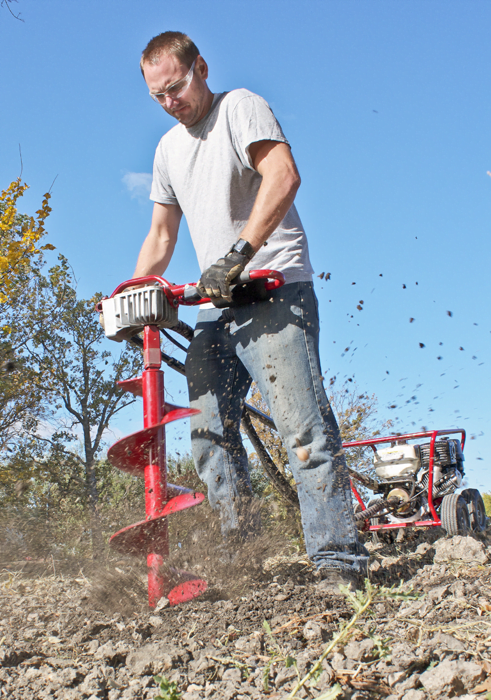


 If you know you’ll be working in limited access locations, such as backyards or even residential basements, you will need an extremely mobile drill. Transport dimensions of 26 inches wide and 80 inches tall are compact enough for the drill to squeeze into an elevator to reach a basement and easily fit through gates and doorways. And if you want the option to expand into other applications, such as foundation repair, you will want a rig able to dig close to structures and light enough to prevent lawn damage.