Using an Earth Drill to Successfully Install Wooden Fence Posts
Installing wooden fence posts can be a great DIY project, especially if you’re renting an earth drill to make the job more efficient and less labor-intensive. Before you get started with your fencing project, there are a few things to know to set yourself up for success and prevent frustration in the future.
Plan Ahead
As tempting as it might be to start drilling as soon as possible, it’s important to call 811 and check local codes and ordinances before you drill. 811 is the national call-before-you-dig phone number that will send out a locator who will mark the approximate location of any buried utilities with paint or flags so you can avoid them. Some areas will also require permits before you build your fence, so make sure not to skip this step.

What You’ll Need:
- Shovel
- Gravel
- Level
- Concrete mix
- Mechanical earth drill with an auger 3 times wider than the posts
- Stakes (enough for each wood post)
- Wood posts (at least 8 feet in length)
- Rope (the length you’re setting your fence posts apart)
Lay the Foundation
The type of wood you choose for your fence posts will determine their life expectancy. It’s also important to look for chromated copper arsenate (CCA) pressure-treated wood, which will slow the decay of wooden fence posts over time. Pine is a popular choice for fences that can last up to 30 years when treated. Other long-lasting woods are redwood, sweetgum or cedar because they are highly resistant to moisture which helps prevent decay, cracking or warping.
Once you have the supplies you’ll need, carefully mark the location of each post with a temporary stake. When building wooden fences, it’s crucial to have the fence posts in a straight line, otherwise you’ll notice the poles weaving in and out of line after the poles have been placed. Stretch a long rope between each stake for a simple way to measure and mark the location of each post.
After you have marked the location of each post, it’s best to use a shovel to remove any sod you might be drilling through. Grass and vegetation can clog the end of an auger — especially when wet. This step might seem like a hassle at first, but it will save you time and frustration once you start drilling.
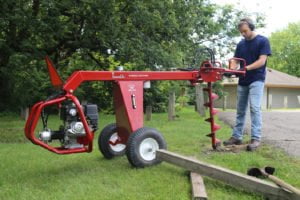
When it comes to picking a drill to rent, we suggest prioritizing safety. All Little Beaver earth drills incorporate torque tubes along with a slip clutch for added safety while drilling. A torque tube offers consistent safety by absorbing shock as you encounter different soil and resistance. On the other hand, the slip clutch offers protection for both the operator and the drill if you hit a rock or tree root while drilling.

Get Drilling
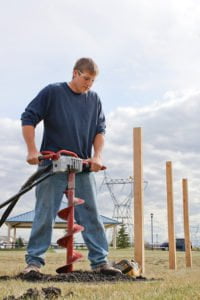
When the prep work has been finished, it’s time to get drilling. Make sure the auger enters the soil perpendicular to the precise point you marked with the stake and keep it vertical as you drill. It’s important to prevent the auger from entering the ground at an angle; otherwise, you risk setting a crooked fence post or a creating hole that’s difficult to backfill.
Dig the fence post hole so the diameter is 3 times the width of the post. For example, if the fence post has a 3-inch diameter, the hole should be about 9 inches wide. The depth of the hole should be one-third to one-half the post height above ground. For example, if the fence post is 9 feet tall, the hole depth should be at least 3 feet. If you live in a cold climate, it’s also important to make sure you dig your post below the frost line to prevent the fence posts from moving or heaving when the ground freezes in the winter. To dig below the frost line, check the local frost lines in your area and dig your hole 6-inches below that.
When the hole is complete, make sure to stop the auger and pull it out for a clean hole. To make this step easier than ever, Little Beaver mechanical earth drills have a lightweight design and our hydraulic earth drills feature a reverse button. Continue the drilling process until all fence post holes are complete.
Set the Posts
When all the holes are drilled, pour in about 3 to 4 inches of gravel. This will help with drainage as opposed to a post hole that’s filled entirely with concrete. Use a piece of scrap lumber or other blunt object to tamp down the gravel. This will ensure it doesn’t settle and allows for optimal drainage. On top of the gravel, add about 6 to 8 inches of concrete, and place your post in the middle of the mixture. Using a level right after this step will help to make sure the post is properly positioned. Once the concrete is leveled, fill the rest of the hole by backfilling the dirt and tamping as you go. From here, follow the instructions on your concrete mix to see how long it will take to dry.
After this step, your fence posts are ready to go, and the rest of your fence can be assembled. If you have any questions regarding drilling holes for fence posts with a Little Beaver earth drill, don’t hesitate to contact the Little Beaver team. We’re happy to help with any questions that might come up.