Last updated Mar 27, 2026
Using an Earth Drill to Successfully Install Wooden Fence Posts
Installing wooden fence posts can be a great DIY project, especially if you’re renting an earth drill to make the job more efficient and less labor-intensive. Before you get started with your fencing project, there are a few things to know to set yourself up for success and prevent frustration in the future.
Plan Ahead
As tempting as it might be to start drilling as soon as possible, it’s important to call 811 and check local codes and ordinances before you drill. 811 is the national call-before-you-dig phone number that will send out a locator who will mark the approximate location of any buried utilities with paint or flags so you can avoid them. Some areas will also require permits before you build your fence, so make sure not to skip this step.
What You’ll Need:
- Shovel
- Gravel
- Level
- Concrete mix
- Mechanical earth drill with an auger 3 times wider than the posts
- Stakes (enough for each wood post)
- Wood posts (at least 8 feet in length)
- Rope (the length you’re setting your fence posts apart)
Lay the Foundation
The type of wood you choose for your fence posts will determine their life expectancy. It’s also important to look for chromated copper arsenate (CCA) pressure-treated wood, which will slow the decay of wooden fence posts over time. Pine is a popular choice for fences that can last up to 30 years when treated. Other long-lasting woods are redwood, sweetgum or cedar because they are highly resistant to moisture which helps prevent decay, cracking or warping.
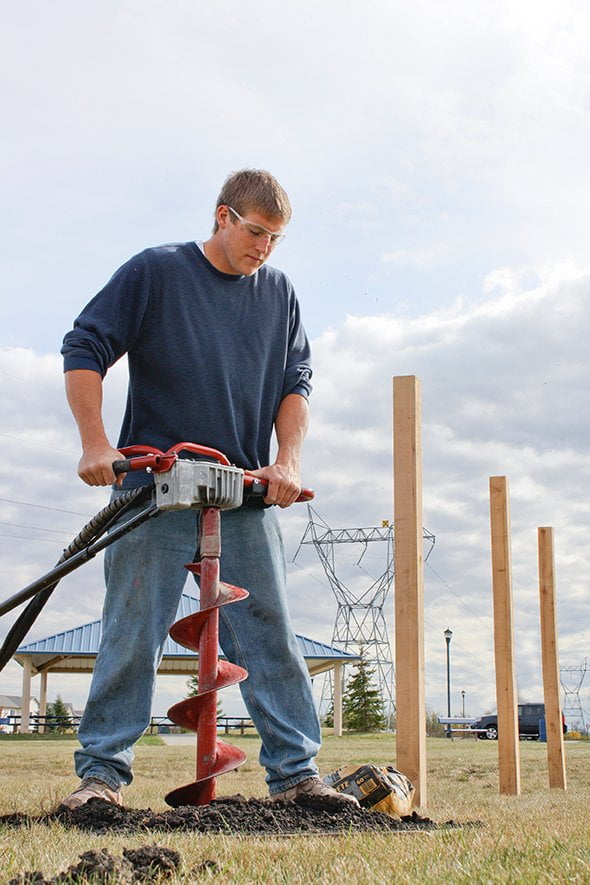
Once you have the supplies you’ll need, carefully mark the location of each post with a temporary stake. When building wooden fences, it’s crucial to have the fence posts in a straight line, otherwise you’ll notice the poles weaving in and out of line after the poles have been placed. Stretch a long rope between each stake for a simple way to measure and mark the location of each post.
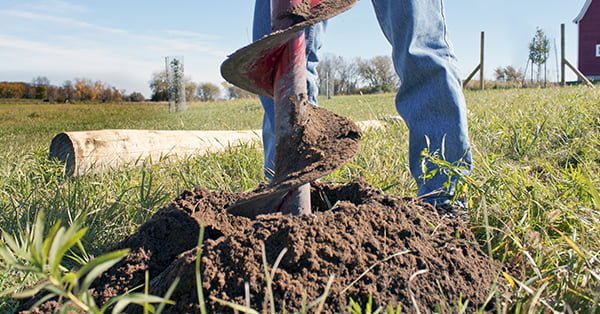
After you have marked the location of each post, it’s best to use a shovel to remove any sod you might be drilling through. Grass and vegetation can clog the end of an auger — especially when wet. This step might seem like a hassle at first, but it will save you time and frustration once you start drilling.
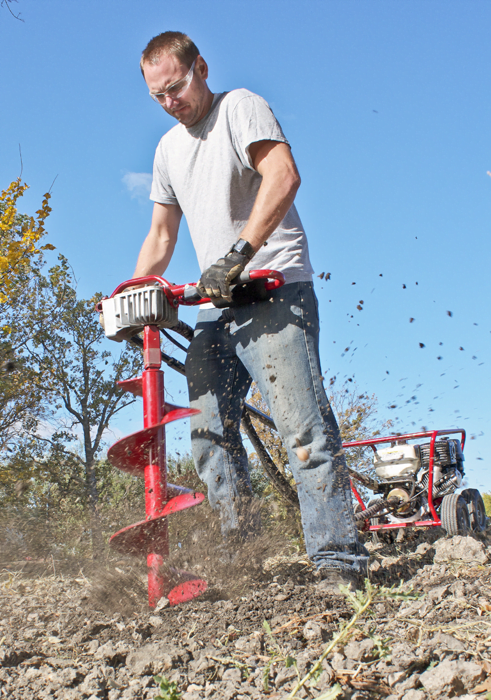
When it comes to picking a drill to rent, we suggest prioritizing safety. All Little Beaver earth drills incorporate torque tubes along with a slip clutch for added safety while drilling. A torque tube offers consistent safety by absorbing shock as you encounter different soil and resistance. On the other hand, the slip clutch offers protection for both the operator and the drill if you hit a rock or tree root while drilling.
Get Drilling
When the prep work has been finished, it’s time to get drilling. Make sure the auger enters the soil perpendicular to the precise point you marked with the stake and keep it vertical as you drill. It’s important to prevent the auger from entering the ground at an angle; otherwise, you risk setting a crooked fence post or a creating hole that’s difficult to backfill.
Dig the fence post hole so the diameter is 3 times the width of the post. For example, if the fence post has a 3-inch diameter, the hole should be about 9 inches wide. The depth of the hole should be one-third to one-half the post height above ground. For example, if the fence post is 9 feet tall, the hole depth should be at least 3 feet. If you live in a cold climate, it’s also important to make sure you dig your post below the frost line to prevent the fence posts from moving or heaving when the ground freezes in the winter. To dig below the frost line, check the local frost lines in your area and dig your hole 6-inches below that.
When the hole is complete, make sure to stop the auger and pull it out for a clean hole. To make this step easier than ever, Little Beaver mechanical earth drills have a lightweight design and our hydraulic earth drills feature a reverse button. Continue the drilling process until all fence post holes are complete.
Set the Posts
When all the holes are drilled, pour in about 3 to 4 inches of gravel. This will help with drainage as opposed to a post hole that’s filled entirely with concrete. Use a piece of scrap lumber or other blunt object to tamp down the gravel. This will ensure it doesn’t settle and allows for optimal drainage. On top of the gravel, add about 6 to 8 inches of concrete, and place your post in the middle of the mixture. Using a level right after this step will help to make sure the post is properly positioned. Once the concrete is leveled, fill the rest of the hole by backfilling the dirt and tamping as you go. From here, follow the instructions on your concrete mix to see how long it will take to dry.
After this step, your fence posts are ready to go, and the rest of your fence can be assembled. If you have any questions regarding drilling holes for fence posts with a Little Beaver earth drill, don’t hesitate to contact the Little Beaver team. We’re happy to help with any questions that might come up.
Last updated Mar 27, 2026
Solutions to common hydraulic drill troubleshooting questions
Using a hydraulic earth drill can make your projects easier than ever, which is why we want to do everything we can to make sure it’s operating in peak condition. Whether you feel like your hydraulic earth drill might be losing power or the starter rope is becoming difficult to pull, you’ll find the solutions to these questions and more right here.
Making the Starter Rope Easier to Pull
If it’s difficult to pull the starter rope on your hydraulic earth drill, check to make sure the quick disconnect couplings are fully engaged. Quick disconnect couplings provide fast and easy connection of fluid lines to easily start the drill. When they are not fully engaged, pulling the starter rope can be difficult.
The hoses can be easily connected without using tools. Connect the handle to the power source, attaching the return side first. This is the long hose that comes from the return line filter. Then, connect the pressure side of the handle to the power source.
Fixing Auger Turning Issues
When the auger turns fine in one direction but does not turn or turns very slowly in the other direction and stops when hitting the ground, your valve control linkage is most likely bent.
The valve control linkage is a small rod that connects the control to the valve spool. To fix this, straighten the linkage, making sure the flat part of the lever (the part you push or pull with your fingers) does not touch the handlebar at any time.
Improving Drill Power
If your hydraulic earth drill appears to have lost power, double check the oil that was used at the last service interval. Some retail or automotive stores sell multipurpose oils designed for tractors that are labeled “hydraulic oils.” These oils are not suitable for the Little Beaver power source because they have different additive packages. This can cause the hydraulic components to degrade faster and power to decrease due to friction and internal leakage. If you find that inappropriate oil was used, we suggest having your hydraulic drill checked by a reputable service dealer or calling us at 936-327-3121 and replacing the oil to avoid long term damage. It’s very important to always use the recommended grade when replacing hydraulic oil and to be sure to follow a schedule for regular oil changes.
If the troubleshooting solution you’re looking for isn’t listed here, take a deeper look into our service FAQs for hydraulic earth drills or check out the owner’s manual. If the answer to your problem still isn’t coming up, don’t despair! Contact us to speak with a member of our team for a personalized solution.
Last updated Mar 27, 2026
How Little Beaver Earth Drills bring versatility and efficiency to municipalities
Municipalities have their work cut out for them. Whether it’s city maintenance workers or general contractors hired to sustain parks in a city, town or borough, a day’s work can involve several industries’ skills rolled into one crew. They can be installing fence posts in the morning, replacing sprinkler lines mid-day and find themselves planting trees in the afternoon.
With this much variety, working smarter, not harder, is paramount to overall productivity. And having versatile tools that allow crews to better utilize labor, safely, while also outperforming other methods, can have a major impact on efficiency. Little Beaver Earth Drills can do just that. Our full line of earth drills enables safe one-man operation with nearly two times the productivity of other units. It’s just a matter of finding the Little Beaver earth drill that best meets your municipality’s needs.
Here are our two most popular earth drills for municipalities and how they can streamline work for grounds crews.
Mechanical Drills + Boring
If your town or city plants a lot of small greenery, installs several fences or other tasks that require crews to dig numerous footings quickly throughout the year, our Mechanical Earth Drills may be right for you. Perfect for horizontal boring or fast, narrow hole drilling, these drills, like all our drills, allow for safe, one-man operation and have the speed to help crews excel.
With our mechanical drills, users can choose from augers ranging from 1.5 to 16 inches in diameter with 36- or 42-inch lengths. And with multiple gear reduction ratio options, crews can choose a mechanical drill with 360 RPM for loose, soft soils or one with a lower speed that is better suited for dense, rockier formations. With a mechanical drill, crews can quickly install a long row of shrubs and then shift to setting a pole for a basketball hoop in denser soil — all without missing a beat.
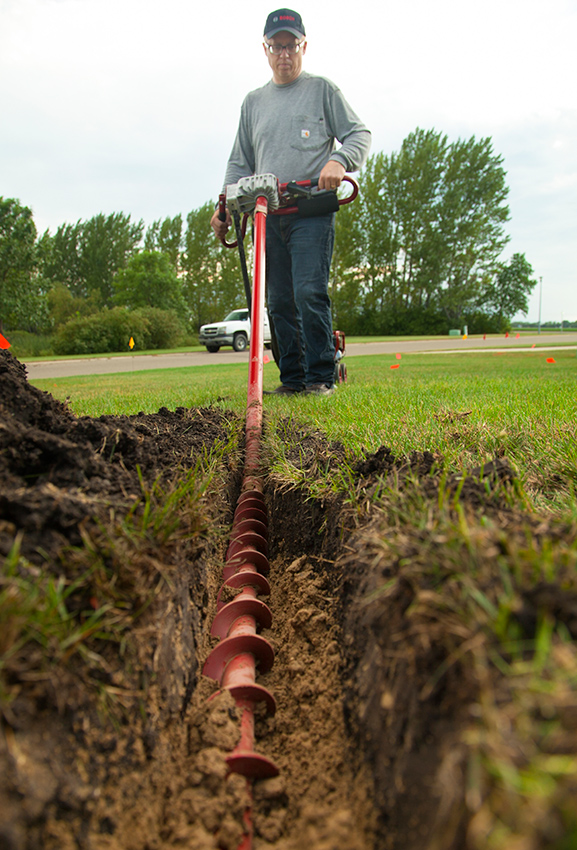
To further increase municipal staffs’ versatility, we make Horizontal Boring Kits for our Little Beaver Mechanical Earth Drills. These are available in a sidewalk kit, for boring short distances up to five feet long, and a driveway kit, for boring up to 50 feet. The horizontal boring attachment allows grounds crews to install everything from sprinkler systems and lighting wire to drainage pipes and more, all with an easy-to-connect attachment.
Whether horizontal boring or planting a row of shrubs, these tasks, and everything in between, can be accomplished with one crew member thanks to our industry-leading design. A centrifugal clutch and torque tube eliminate dangerous operator kickback and prevent jarring stops when encountering an obstacle. Additionally, the innovative torque tube redirects torque to the engine carriage instead of the drill’s handles. These features make for a winning combination that spares drill components and protects the operator’s safety, allowing crews to better utilize their labor.
But, if heavy-duty applications and anchoring are abundant and soil types are consistently rocky and dense, hydraulic drills might be a better choice.
Hydraulic Drills + Anchoring
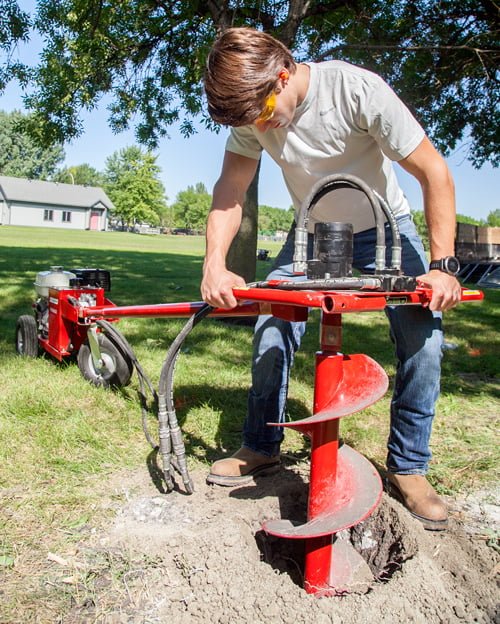
Our Hydraulic Earth Drills, with their powerful torque, are perfect for installing anchors or digging holes for large playground equipment, awning supports, sizable landscaping and other tasks that require deep, wide footings.
These earth drills accommodate augers up to 16 inches in diameter with drilling depths of up to 35 feet depending on the auger. The seemingly endless auger options combined with rugged drill construction and increased torque allow crews to take on lighter tasks like planting landscaping and then quickly shift to heavy-duty construction, like installing support beams for a sunshade. This gives crews the flexibility to divide and conquer whatever their municipality throws at them.
And with the hydraulic drill line, crews don’t have to look elsewhere for anchoring needs. Thanks to our innovative torque tube and precise auger rotation at low speeds, our hydraulic drills are perfect for anchoring. Our Anchor Adapters are available for various applications from anchoring poles and beams to installing tent stakes, making them a perfect, versatile solution for municipalities. By quickly snapping an adapter onto our earth drill’s high torque anchor handle, crews have a one-man anchoring machine to secure footbridges, large playground equipment and more — a much safer and more efficient option than anchor crankers.
The extensive tasks that await city maintenance crews and contractors every morning don’t also have to mean an extensive set of tools. With a little knowledge about the applications, crews can choose one Little Beaver Earth Drill to carry them through the day — safely and efficiently.
Last updated Mar 27, 2026
Which Should You Choose?
With all the earth drills on the market that are capable of installing a fence, how do you sort through the options to find the best drill for your specific needs? Little Beaver offers multiple options that appeal to fencers looking for the labor-saving benefits of safe, one-man drilling. While any drill may do the trick, different drills have different strengths depending on the job, and a drill that consistently gives you great performance can help you land more jobs and increase your profitability. Here’s a breakdown of our most popular options for fencing and the jobs they’re best suited for:
Mechanical Earth Drill
If the majority of your jobs require speedy, one-man drilling, look to our mechanical earth drill series.
Little Beaver mechanical earth drills combine a compact, lightweight design with unbeatable speed and precision. These transmission-equipped units feature high-speed auger rotations and excel in situations requiring numerous posts in very little time. And with optional 13:1 or 20:1 gear ratios, they can take on everything from soft soils to dense, rockier applications.
If you’re looking for more ways to expand your business, Little Beaver mechanical earth drills are compatible with horizontal boring kits, enabling expansion into landscape lighting installation and running sprinkler lines or cable under driveways and sidewalks.
A centrifugal clutch and torque tube truly enables safe, efficient one-man drilling, eliminating dangerous operator kickback and preventing jarring stops when an obstacle is encountered. Additionally, the innovative torque tube redirects torque kickback to the engine carriage instead of the drill’s handles. Other brands of drills reduce performance to accommodate one-man hole digging. But not Little Beaver. We feature all of the power without the inherent risks of other drills.
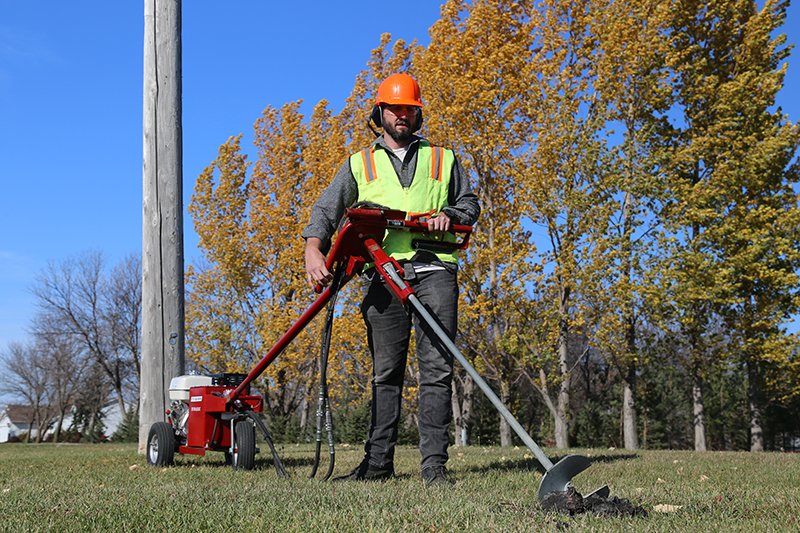
Hydraulic Earth Drill
Despite all the advantages of mechanical earth drills, a season full of drilling a large auger through hard packed clay and soft rock formations may leave mechanical drill owners envying their hydraulic-equipped competitors.
Hydraulic earth drills are your go-to drill for the most challenging soils because of their rugged bodies and powerful torque. Their high torque and precise operation at low speeds allows operators to drill clean, accurate holes, even in the most difficult applications. Hydraulic drills are ideal for drilling wide holes because they have the torque to drive large-diameter augers — some as wide as 16 inches — making them perfect for installing large fence posts, gate posts and any large-scale decorative fencing. Additionally, our hydraulic earth drills have a reverse position so you can safely back-out the auger if it becomes lodged under a rock or tree root.
While hydraulic drills don’t have a clutch to worry about, the operator could be at even greater risk of injury due to the large amounts of torque from these drills. This is where our torque tube is more important than ever as it allows a single operator to safely handle high levels of torque that would be an unthinkable risk with any other design.
Towable
Do the advantages of our hydraulic earth drills sound appealing for your fencing crew, but you need easier maneuverability and transportation while still maintaining high torque? If so, look no further than our Towable Hydraulic Earth Drill.
Our Towable drill consists of a T-shaped steel frame with highway-rated tires in the center, an 11-horsepower Honda engine located on one end and the auger and controls on the other. The frame balances the weight of the drill over the wheels, making it easy for one person to move, pivot into place and manage when drilling. The wide tires also prevent damage to delicate turf or landscapes.
The design reduces operating weight by roughly 50% compared to traditional hydraulic drills, and it requires less than 20 pounds of force to pivot into digging position. The frame also eliminates torque for safe one-person drilling. The rig can be conveniently towed using a removable “no tools” towing hitch, saving valuable truck or trailer space and making it an economical tool for fencing contractors of any size.
UN-Towable
If the maneuverability of the Towable is just what your fencing operation needs but you require more transportation options and a lighter package, our UN-Towable Hydraulic Earth Drill is the workhorse you’re looking for.
Like the Towable, our UN-Towable operates with a balanced design that makes maneuvering and operation a breeze, but it comes in a smaller package with greater transportability and still achieves drilling specs similar to that of the Towable.
Unlike the Towable, which must be towed behind a truck or loaded onto a trailer, the UN-Towable can be easily moved to the jobsite in the back of a pickup truck or SUV. Alternatively, an optional slide-in receiver hitch offers an additional transportation method. The user-friendly E-Z load bracket is designed to fit in any two-inch receiver, commonly found on most pickup trucks and SUVs. Simply secure the unit in the hitch, crank up the machine until it stops, and insert the pin to lock it in place. This allows fencing crews to carry more and do more without worrying about transportation logistics or expanding their fleet.
Additionally, smaller fencing crews or those needing more flexible transportation will benefit from the UN-Towable’s removable power pack. By detaching the power pack, the overall weight of the drill is reduced by 50%, allowing the machine to be easily transported in two parts.
Fencing can be tough work; don’t make it harder with an ill-suited drill. Consider your crew’s size, typical jobs and future needs to pick a drill that will help you excel at jobs today and give you a greater return on your investment down the road.
Last updated Mar 27, 2026
Keeping Safety in Mind Before Starting the Job
Whether you’re using a hand shovel or an excavator, an earth drill or a trencher, a hole is a hole and there are several safety precautions that come along with a digging project. Sharp tools present the opportunity for dangerous situations, let alone combined with the power of a mechanical or hydraulic rig. Choosing a safe machine, calling before you dig and operating the machine according to manufacturer recommendations are all things to consider before starting. Keeping safety in mind before starting any job is crucial to avoiding injuries, some of which can be serious.
Select a Safe Drill
Choosing a drill with safety-enhancing features can make or break a project. No matter what kind of drill you’re looking for – mechanical or hydraulic, a larger rig or smaller piece of equipment – there are certain features to look for to ensure the safest operation.
First, make sure the drill has a torque bar. This addition protects operators from the harmful effects of a drill’s torque by transferring kickback from the auger to the power source. By distributing force to the engine carriage as opposed to the handles, one person can safely and comfortably operate these drills. In addition to protecting the operator from harm, torque tubes reduce operator effort and fatigue.
Torque tubes are the only way to ensure safe operation of a one-man drill. The torque tube eliminates the kickback common with competitive earth augers, making one-man drilling safe, fast and productive. Many two-man drills exist, but if they’re not operated correctly, they present a handful of potential issues. If one operator slips or lets go, the other operator risks being thrown and injured. A one-man earth drill is designed to be a safe and efficient piece of equipment.
Additionally, mechanical drills are often equipped with a centrifugal clutch. If the auger encounters an object beneath the surface or if it’s overloaded, the clutch automatically slips to protect the operator from serious injury.
Call Before You Start
 Calling before you dig can be the difference between smooth sailing and a potential disaster. There are millions of miles of buried utilities below the surface, including gas lines, underground sprinklers, sewer pipes and more. Buried gas or power lines are the most dangerous, with the potential for electrocution, fire, severe burns or even fatalities. Always call the national diggers hotline at 811 at least 48 hours prior to digging to have underground utilities marked. When the inspector arrives, pay attention to the details since state laws differ when it comes to how long your permits are valid and what the paint or flags indicate. There may be multiple utility lines to be aware of.
Besides underground utilities, you should have a general idea of what lies below. Fill material, wood, rocks and more can be hiding underground. Take a good survey of your site beforehand. Not only does this provide another level of safety, but it helps you make a decision on which kind of drill bit to select.
Operate Safely
After you’ve equipped yourself with the safest drill and underground utilities have been marked, it’s time to start your project. If you’ve chosen a one-man drill, it’s important to operate the drill alone, as the handles are designed for a solo operation. Bystanders should be at least 10 feet away, and everyone should be wearing hard hats and safety goggles.
Avoid loose-fitting clothing, including gloves. If work gloves are too loose, they can hinder your ability to appropriately operate the drill. Wear work boots or quality athletic shoes, avoiding hanging shoelaces that could get caught in the auger.
Once the auger is running, position it perpendicular to the ground for the best possible control and optimal results. Touch the auger to the ground before you start rotating. For the best control, adjust the downward pressure based on the soil conditions. If the soil is soft, ease up slightly. If the ground is harder, apply a little more pressure, but not so much that rotation slows or stops.
Once you’ve reached the desired depth, there’s a proper procedure for safely removing the auger from the ground. Release the throttle control and allow the auger to come to a complete stop. Once the auger has stopped turning, it can safely be removed from the hole. Hydraulic rigs feature a forward/reverse lever to make it easier to lift the dirt out. This allows the operator to ease the drill out of the ground as opposed to tugging heavily on the equipment, greatly minimizing the physical effort required to get the job done.
By following a few easy steps, you can ensure your drilling operation is safe, efficient and injury-free.
Last updated Mar 27, 2026
Increase ROI with Your Hydraulic Drill
These days, everyone has a side gig — a profitable endeavor outside their normal operation that utilizes the skills and equipment they already have to increase productivity and income. In competitive industries like fencing and landscaping, this kind of versatility is the key to a successful business. Being able to do more with equipment you trust means more opportunities, increased productivity and faster ROI.
Across the country, contractors know Little Beaver products offer optimum power and portability in a single-operator package that won’t break the bank. Whether it’s post hole digging, soil sampling, landscape or industrial fencing applications, they trust our Hydraulic Earth Drills to get the job done.
To help tackle even more projects and allow contractors to get the most out of their machines, we developed a number of attachment kits for our hydraulic earth drills. These accessories make it easy to switch gears from digging holes for fencing and landscape projects to anchoring for light utility and mobile home applications, as well as horizontal boring — increasing the operator’s versatility and potential.
Putting Utility Back in Utility Anchoring
One industry Little Beaver helps contractors explore is utility anchoring. With minimal investment — just a High-Torque Anchor Handle and Utility Anchor Adapter — your Hydraulic Earth Drill becomes a safe, efficient tool for utility applications.
The anchor is attached to the adapter and, using less than 60 rpm, quickly penetrates most soil types for a firm, lasting anchor. Little Beaver’s steel torque tube eliminates kickback, allowing a single operator to complete the job safely and efficiently. And thanks to the Hydraulic Earth Drill’s three-wheel chassis, the drill rig can go wherever it’s needed.
As a supplemental job, utility anchoring offers contractors an efficient use of equipment and manpower. But even for utility companies, Little Beaver’s Utility Anchoring Adapter offers a safer, more efficient alternative to anchor crankers and hand setting. In less than two minutes, an operator can install a utility anchor with a hydraulic earth drill. In less than an hour, they can have an entire pole done and be on the way to the next. Compare that to the hand method which can take over half an hour to set a single anchor. So, whether you’re looking to expand services or just provide more efficient services, Little Beaver helps you adapt.
Bringing It Home
Looking for even more added value applications for your hydraulic earth drill? We also offer a Mobile Home Anchor for securing mobile homes to a foundation.
Like the Utility Anchor, the adapter works with our Hydraulic Earth Drill and High-Torque Handle to quickly and efficiently drive anchors through most soils. In as little as 30 minutes, a single operator can tie down an entire mobile home.
Then when it’s time to pull up stakes and move on, just hit reverse on Little Beaver’s Hydraulic Earth Drill and anchors are removed as easily as they went in. The reverse feature also proves useful with initial anchoring when encountering obstructions or the anchor needs to be removed for any reason.
Anchoring ensures the safety and stability of mobile homes in high winds and other inclement weather. Regardless of how often you perform this application, it’s important to properly secure every anchor every time. With Little Beaver’s Hydraulic Earth Drill and Mobile Home Anchoring Kit you have a reliable partner.
Maximum Versatility for Maximum ROI
Whether it’s a side gig or your bread and butter, Little Beaver Hydraulic Earth Drills and accessory kits let you do more. From anchoring to digging holes and all the groundwork in between, Little Beaver will help take your business where you want to go.