Tips For Preventing and Diagnosing Mechanical Earth Drills Issues
Mechanical drills’ high operating speeds and compact sizes make them a popular choice for contractors and rental centers — and ideal for drilling holes quickly. Although these transmission-powered machines have significantly more moving parts than their more costly hydraulic counterparts, simple knowledge of how to prevent and diagnose common problems will keep your drill running efficiently. Below are answers to questions we get often and some tips to help you achieve better ROI.
What steps can I take to minimize the risk of damaging the drill?
Start by choosing a unit with the correct gear ratio and auger for your soil. For soil with minimal rocks and few roots, a 10:1 gear ratio with a standard auger will provide fast and efficient results. For drilling in clay or other difficult conditions, a 10:1 gear ratio will still work, but switch from a standard to carbide blade to effectively cut through the soil. If you’re working in an area with rocks exceeding 3 inches in diameter, choose a drill with a 20:1 gear ratio reduction and a heavy-duty auger. The gear reduction slows the auger from 360 to 180 rpm and will pop the rocks out of the soil and continue spinning.
Should I be concerned that the gearbox is hot or making an unusual sound?
The gearbox will always be hot to the touch when the drill is operating. However, if the transmission is extremely hot, smells like burned oil or starts making unusual sounds, check the oil level. Oil leaks can occur around the seal, lower output shaft or the top of the transmission, and will lead to drill damage if ignored. Low oil also increases the risk of premature bearing wear, which can result in excessive heat and unusual sounds. To prevent early wear, check the transmission oil level and condition monthly or every 40 hours of operation.
The engine is running, so why won’t the auger turn?
A problem with the drivetrain, most likely along the flexible drive shaft, is to blame. To pinpoint the issue, start by inspecting the end fittings for cracks or breaks. If there are broken wires or sharp kinks, it’s time to replace the shaft housing. If things appear fine from the outside, remove the flex shaft for further inspection. To prevent flex shaft damage, clean, examine and grease the flex shaft every 50 hours of operation. Check your owner’s manual to determine the correct procedure for greasing the flex shaft.
Why does the clutch slip or cause the drill to jerk during operation?
Over time, a drill’s clutch padding wears, resulting in reduced performance when engaging the auger or accelerating the engine from idle to full speed. The clutch will continue to run, even if the padding is completely gone, leading to easily detectable problems. It’s best to inspect the clutch every 30 days or any time you lubricate the flexible drive shaft. Regular checks will help you track the wear so you can replace the clutch pads before the drill loses performance.
Why is the drill less efficient than it used to be despite everything working properly?
Too often, operators allow the points and blades to wear beyond the point of being effective. The drill can run perfectly and spin all day, but if the blades and points are worn, the unit will become less and less effective.
Where can I find additional resources?
Information is always available at your fingertips, including comprehensive maintenance brochures and video tutorials. These helpful tools are excellent resources and often include visuals as well as step-by-step instructions.
Knowing your drill, keeping up with maintenance and accessing additional resources when questions arise will go a long way toward successful drilling.
Routine preventative maintenance is crucial. It boosts uptime and ROI for earth drills, which means faster project turnarounds and hassle-free hole digging — all while reducing your service costs.
To help you stay a step ahead of your drill’s maintenance, our Little Beaver team created a video series that aims to reduce downtime and increase service life for your equipment. In addition to step-by-step maintenance instructions, the videos provide information regarding best practices and tips for getting the most out of your drill.
Learn how to properly set up the Little Beaver mechanical earth drill for fast success starting your projects, whether it’s installing a fence, building a deck or planting a row of trees. Follow along as Randy VanWagner, our engineering manager, demonstrates the step-by-step process for setting up the drill as well as disassembling it for transportation or storage.
Achieve Project Success with the Right Methods and Equipment
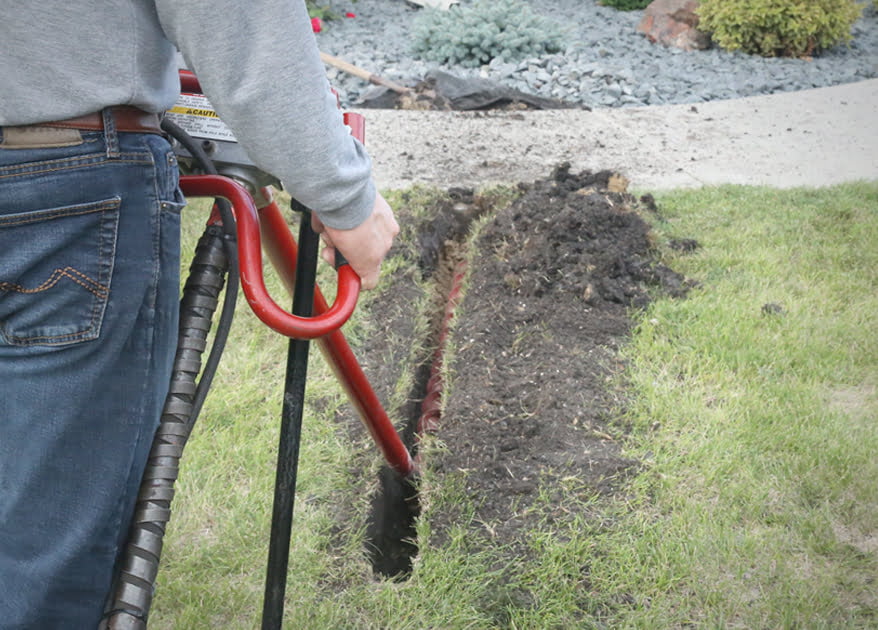
If you’ve installed landscape lighting, underground sprinkler systems or drain tile running through a lawn, you understand the demanding work caused by a sidewalk or driveway blocking your path. Boring under cement may not be a part of every job you do, but it’s nice to know you have a solution available for this situation.
With help from Little Beaver’s horizontal boring attachments, you can get underneath almost any concrete obstacle to install conduit, pipe and irrigation systems. The attachments pair with our Mechanical Earth Drills. Before you start your next project that involves burying lines, consider your horizontal boring options and learn best practices.
Sidewalk or Driveway
The first step is to evaluate the size of the project. This will help you determine the equipment best suited for your needs. Smaller jobs, such as boring under sidewalks to connect a water line or run wires for lighting, are best done with a sidewalk boring kit that easily bores up to 5 feet.
Larger projects — as long as 50 feet — can be tackled with the driveway boring kit. This attachment bores smoothly under a street or driveway, which makes it ideal for installing underground irrigation systems. After choosing the proper attachment, you can get started with your boring project.
Digging In
First, gather your horizontal boring kit, mechanical drill and either a trenching machine or a round point hand shovel and spade. For wet drilling you will also need a garden hose, 3/4-inch Schedule 80 water pipe and 3/4-inch pipe couplings.
Then, dig a small starter trench so that you can reach the correct depth and angle as you start to bore. The dry boring kit requires a 6-foot-long trench 6 inches below the bottom of the concrete slab. When using the wet auger kit, dig a trench 15 feet long. Trench depth is important, as a deeper trench will greatly reduce the risk of cracking concrete while boring. Then move to the opposite side of the pavement and dig a shorter trench to receive the drill as it passes from under the pavement.
Since this is such a low-torque job, the torque tube is not needed. Disable it by attaching the horizontal drill key to the tube connector, which activates the safety interlock. Drill setup varies slightly for each auger kit, so follow the instruction manual for finer details. Before you begin, call 811 to verify there are no existing utilities in the digging area and follow all other safety precautions.
Here to Serve You
Little Beaver Mechanical Earth Drills are designed to make horizontal boring easier so you can take on more boring projects in a shorter period of time. To complete your next horizontal boring job quickly, efficiently and safely, watch our attachments in action. Then contact us to get the horizontal boring attachment that fits your next project. Do not let sidewalks and driveways get in your way.
Never let poor productivity of handheld equipment and the risk of disturbing the turf with skidsteer tracks slow down your landscaping business. Whether you’re installing fence posts, planting trees or soil sampling, using an earth drill helps you work faster with minimal impact to the customer’s lawn. Here’s how earth drills maximize your productivity.
Features that protect the operator and equipment also save your budget. Paying workers’ compensation, or shop repairs can have a huge impact on your bottom line. Avoid dangerous kickback to the operator with a steel torque tube on mechanical and hydraulic models. The torque tube transfers drilling torque from the drill head to the engine carriage, virtually eliminating the risk of kickbacks to the operator as well as damage to the transmission and drive cable. Traditionally, contractors used two-man hole diggers, but choosing a model with a torque tube cuts labor costs in half. Another safety feature found on hydraulic units is a pressure-relief valve to stop the machine if hydraulic pressure reaches unsafe levels. More safety and less downtime equals greater productivity.
Accuracy and speed are fundamental for completing more projects. Manually digging holes is a tedious and inefficient process. Drill several feet deep in seconds rather than minutes with Little Beaver’s mechanical and hydraulic drills. Mechanical drills achieve speeds as fast as 360 RPM and hydraulic drills reach 285 RPM.
Comfortable and convenient features lead to more productivity. Avoid throwing the towel in early due to operator aches and pains. If you hit an obstacle, hydraulic earth drills feature a comfortable one-touch reverse control to help you back out without having to manually lift the dirt and auger on your own. And, padded handles, easy access to the throttle controls and on/off switches on mechanical and hydraulic earth drills ensure a comfortable operation.
Simple maintenance equals less downtime. Easy servicing ensures that equipment is always ready to go and helps protect your equipment against wear. An earth auger with easily replaceable and reversible points and blades keeps the project running smoothly by cutting through a variety of soils and extends the auger’s service life.
Easy maneuverability is key to getting around the worksite. Bulky equipment, such as skid steers, are difficult to maneuver through tight spaces and might require following up with handheld tools to get the job done, which can eat up valuable work hours. Compact mechanical or hydraulic earth drills with wheeled power sources, on the other hand, easily access narrow side yards. The pneumatic tires, coupled with the drills’ light weight, prevent lawn damage and make them easy to move. Save valuable truck or trailer space for hydraulic earth drills by using a 2-inch ball hitch for transporting. Or, for additional hauling options, cut the weight in half by unhooking the removable power pack for easy loading and unloading.
Here are some products that can help you be faster and safer as well as grow your job list. Have more questions? Contact us.
Fencing Company Always Ready to Fight Back with Mechanical Earth Drills
It was a crushing one-two combination. In the fall of 2005, Hurricanes Katrina and Rita beat down the Gulf Coast within weeks of each other, leaving splinters of devastation in the wake of their Category 5 forces.
It didn’t take long after the floodwaters receded from New Orleans and surrounding communities for the phone to start ringing at Hercules Fence. One call became a deluge, and for the next three years the fence replacement jobs kept the Lake Charles, Louisiana company working nearly double-time days, with their mechanical earth drills setting thousands of holes. Company owner Charles Harris never appreciated their dependability, power and versatility more than he did in the aftermath of the storms.
Six Decades of Posts
Hercules is a family-owned business that has been installing fences for more than 60 years. There was a time when the work suited the name: crew members dug all the holes by hand, muscling through the toughest soils with manual augers. But for nearly five decades now, Little Beaver mechanical earth drills have been driving the company’s installations because of the drills’ power, reliability and safety. Today, Hercules owns three MDL-8H mechanical drills and uses them for chain link, ornamental, wood and vinyl fences on residential and commercial projects. They’re the most efficient option for bread-and-butter jobs that cover 200-600 feet of fence with 30-60 holes that are 3 feet deep.
Hercules does more expansive commercial and industrial projects, too, installations as long as 25,000 feet that require as many as 2,500 holes up to 12 inches in diameter and 42 inches deep. Because of the sheer scope of the jobs, the crew uses a skid steer equipped with a drill to do the bulk of the digging work. Even for those larger and more challenging projects, the small but mighty Little Beaver machines never get left behind. That’s because for areas with soft soils, a skid steer may get stuck but a couple of workers can get in with a mechanical drill, do the work and get out again.
Workers Use Drills With Skills While Putting Others First
Because of the tremendous amount of devastation from sister hurricanes, Hercules Fence once again turned to the Little Beaver to help them quickly complete the many landscaping projects on their list. The destruction started with Hurricane Katrina, which not only destroyed businesses, homes and infrastructure in the area; it also took out nearly every fence. Making an already horrible situation worse, Rita blew through a couple of weeks later adding to the destruction, even claiming Harris’ own house.
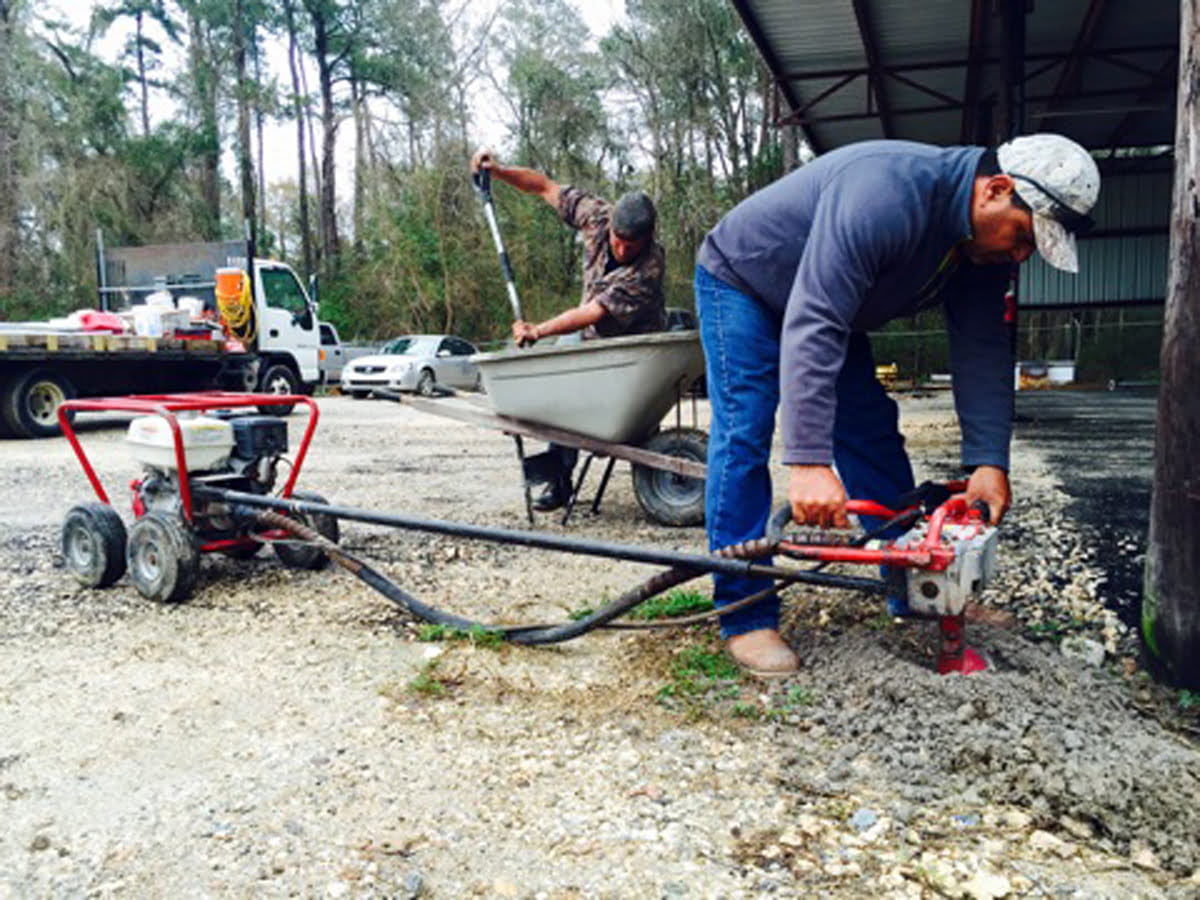
Despite their own devastating losses, Harris and his crew members helped others rebuild. Over the year and a half following Rita, they replaced fences that provided hard-hit residents and companies with the extra measure of privacy and security they’d lost. It was a huge undertaking, but day in and day out, the crew of three men put all three of their Little Beaver drills to work.
The highly efficient Little Beaver drills rotate at up to 360 rpm to quickly bring spoil to the surface and leave clean holes. The fast operation allowed the Hercules crew to work quickly so they could complete as many projects as possible each day. And with the torque tube, one person could safely operate each drill, even when digging with large diameter augers, without getting fatigue from drill kickback.
Hercules and their drills were again put to the test almost three years to the day after Rita roared through, when Hurricane Ike pounded the Lake Charles area. It took more than a year, but once again the Hercules crew worked long days to restore the area’s fences.
Since then the workday hours have backed down to their normal eight, and Harris found the time to rebuild in Lake Charles. The threat of a hurricane will be there every year. But if and when the next hurricane throws some punches, Hercules will be there, armed with Little Beaver mechanical earth drills to sink the holes and put the pieces back together.
We use cookies to ensure that we give you the best experience on our website. If you continue to use this site we will assume that you are happy with it.