Last updated Mar 31, 2026
Factors to Consider
Choosing between mechanical and hydraulic earth drilling equipment is as simple as evaluating the type of work that needs to be done and the environmental conditions that will affect your drilling. Factors like soil type, hole size and auger speed requirements can help you decide whether a Mechanical Earth Drill or Hydraulic Earth Drill will be more effective for your next project.
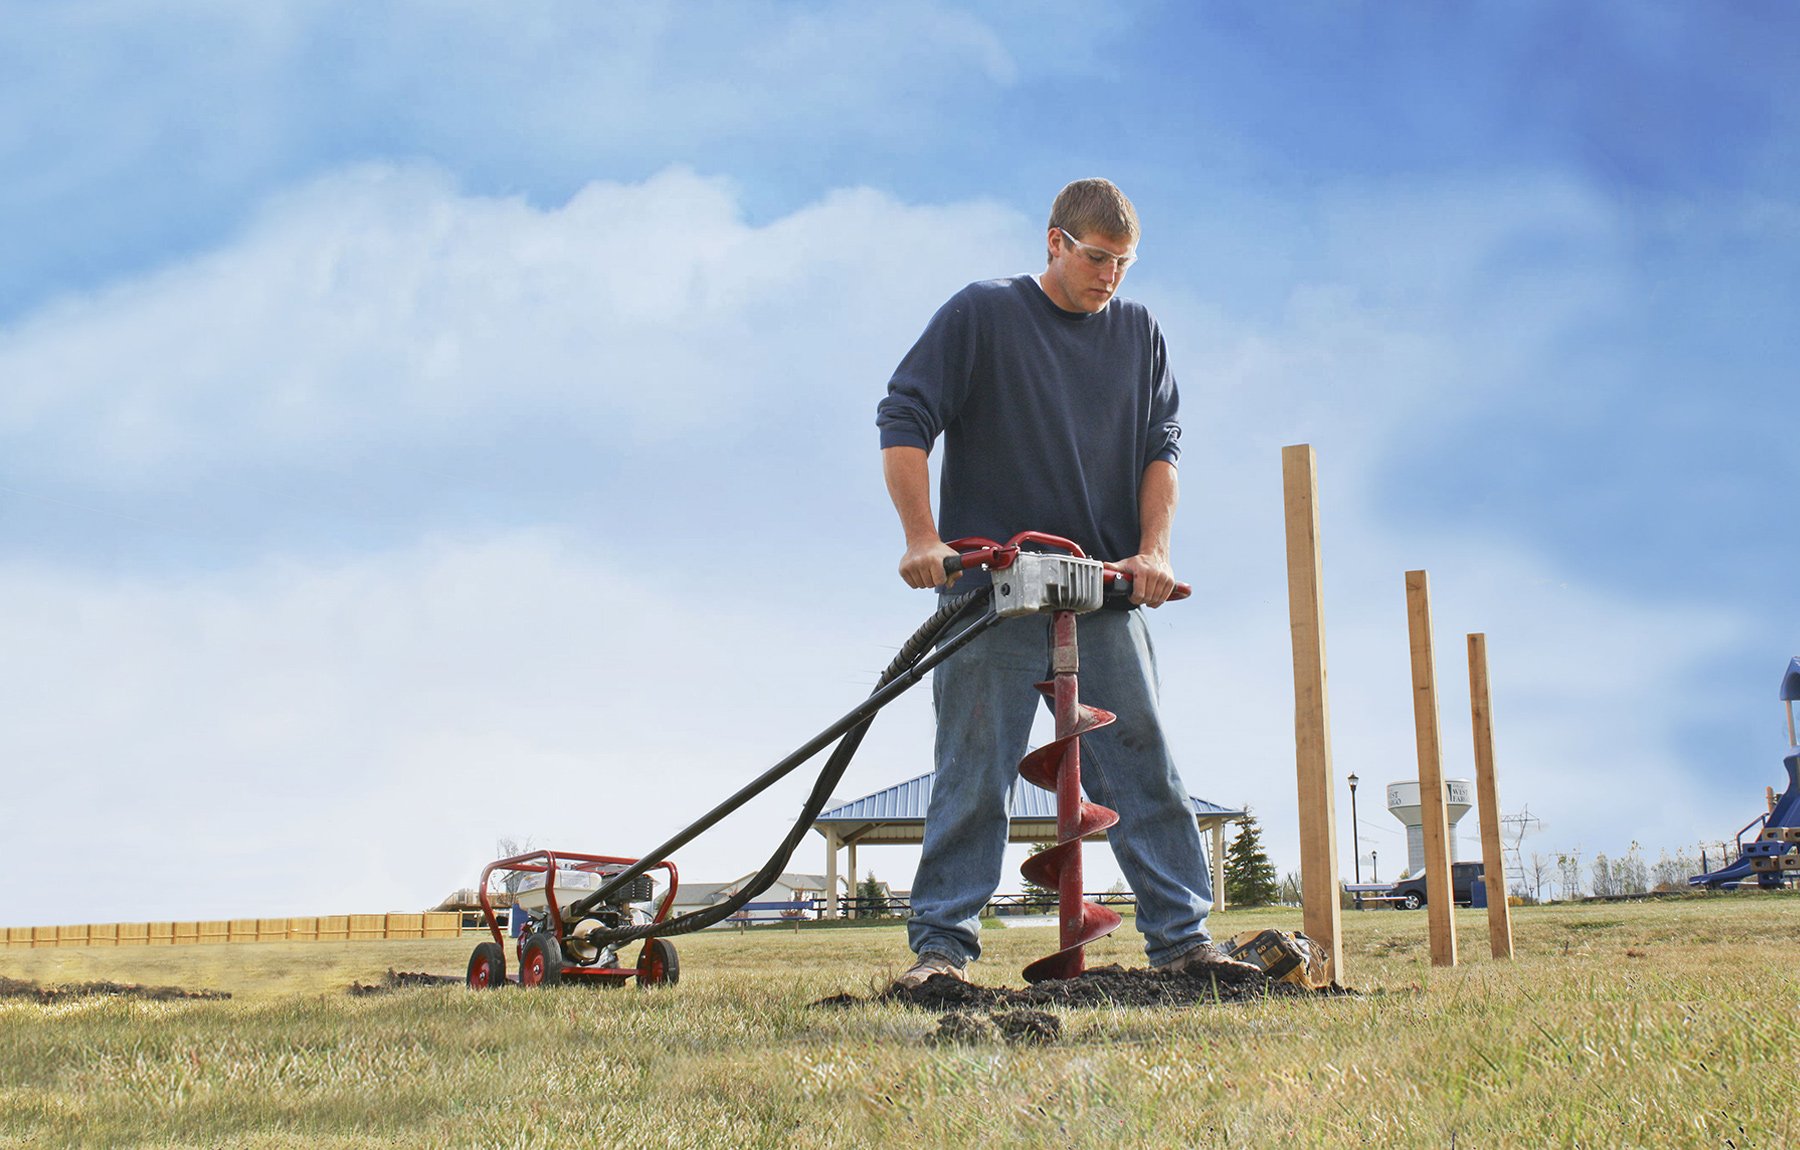
Explore our infographic below for a quick guide on choosing the right drill for a job, then keep reading to dive into more detail. Little Beaver’s Mechanical Earth Drill is your go-to for speed and efficiency. This one-man auger is lightweight, easy to maneuver and makes quick work of sandy soils. Our mechanical drills give you high-speed rotation to the tune of 360 rpm, which delivers clean holes fast. It’s the ideal post hole digger for fence posts, decks and other light-to-medium duty tasks where efficiency matters.
If the scope of your project calls for more power, our Hydraulic Earth Drill is a top choice. It’s built for rocky, clay or frozen soils and can drill large-diameter holes. Hydraulic earth drills operate at a lower speed than mechanical drills but offer more torque for these heavy-duty projects. Despite its robust power, you can easily lift it out of holes using its reversible drive.
While both our mechanical and hydraulic drills are fitted with excellent features to get drilling jobs done, each offers specific benefits to your next project.
Contact our team to learn more about which of our one-man earth drills offers the most efficiency for your operation.

Last updated Mar 27, 2026
Equipment for Unique Fence Installation Jobs
Little Beaver is known in fencing circles for fast and efficient posthole diggers, like our Mechanical and Hydraulic Earth Drills. But our equipment’s capabilities don’t stop there. We know that your projects can vary and expand beyond setting traditional fences — like installing a dog fence or shallow electrical lines that run along a fence. That’s why we offer multiple equipment options for fencing, landscaping and more.
Here’s how our equipment can help streamline your projects:
Underground Fencing
Some fencing projects, like pet fencing, involve digging underground lines around the perimeter of a yard. Digging by hand makes the project longer and harder to complete. But what other option do you have?
Well, there’s our Kwik-Trench mini trencher. We offer two options: the KT 200B and the KT 2400B. The KT 200B is built for lighter-duty jobs and smaller yards while the KT 2400B is for more demanding applications in tougher soils. Here are the overall benefits of both options:
- Minimal turf disturbance
- Trenching speed up to 30 feet per minute
- Trench depth range of 6-12 inches
- Compact with a practical cutter wheel design
- Maneuverable for tight spaces
The Kwik-Trench offers a safe, easy way to dig a uniform trench with consistent depth and size. For fencing contractors, a mini trencher saves hours of hand digging, significantly speeding up trenching tasks. It also creates the opportunity to support other projects, like installing electrical lines for landscape lighting.
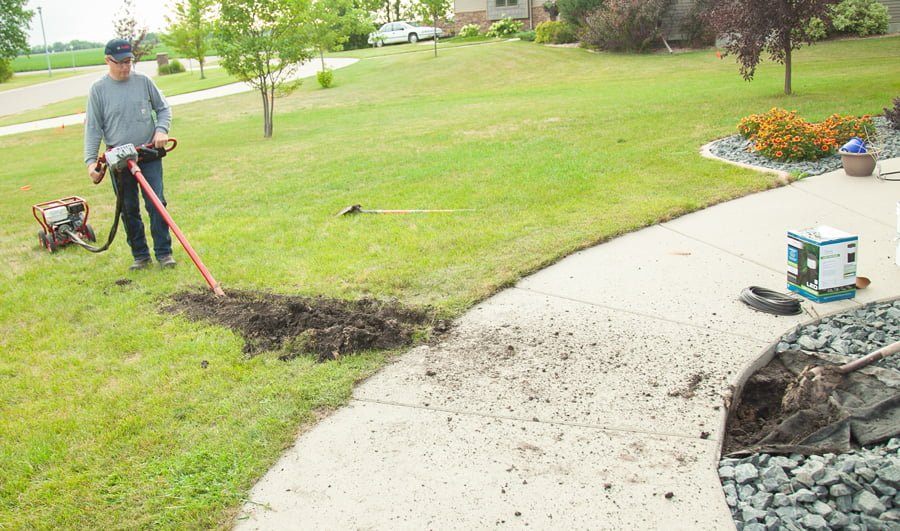
Crossing Under Obstacles
Sometimes, underground fencing and electrical lines need to go underneath an obstacle, such as a sidewalk or a driveway. This task traditionally requires manual tunneling or cutting through the concrete to the ground below. Both of these options are time consuming, and breaking through the concrete diminishes the strength of the entire slab.
If you’re already using our Mechanical Earth Drill for fence installation, or if you’re considering adding one to your fleet, remember that it can be more than just a posthole digger. Our Horizontal Boring Kits pair with your Little Beaver Mechanical Earth Drill and bore cleanly underneath obstacles without disturbing the surface. There are two kits to choose from: a sidewalk boring kit and a driveway boring kit.
The sidewalk boring kit is a dry boring solution that’s perfect for smaller spans like those underneath sidewalks and includes a 5-foot auger with a 3-inch diameter bit and a 5-foot extension with a universal wiggle joint. The driveway boring kit is a wet boring solution and bores up to 50 feet underneath driveways or parking lots. The kit includes the option of a 2-, 3- or 4-inch drill bit as well as a swivel adapter, swivel assembly and horizontal boring key. To complete the kit, operators will need to use a garden hose, 3/4-inch Schedule 80 water pipe and 3/4-inch pipe collar. Both kits connect to our Mechanical Earth Drill.
Expand Your Capabilities
An earth drill isn’t the only piece of equipment from our line that can help optimize your projects. Once you’ve invested in an earth drill, you can expand outward with other solutions to boost your productivity and expand your capabilities. Contact our experts today to learn more about how our equipment can be used for fencing and landscaping.
Last updated Mar 27, 2026
Whether you’re a contractor or taking on DIY landscaping projects, efficiency, precision and safety are essential for a successful job. However, tackling different horizontal boring jobs typically means investing in multiple specialized machines and costs can add up quickly.
But we have you covered.
Designed for the Little Beaver Mechanical Earth Drill, our horizontal boring attachment packages allow you to handle a range of jobs from landscape lighting to sprinkler systems and drain tile, all with one machine. Here’s how our horizontal boring kits for the Mechanical Earth Drill help you do more with less.
A Versatile Machine
Our horizontal boring attachments are designed to work with Little Beaver Mechanical Earth Drills, the top choice for rental store owners, fencing contractors and other professionals who need a one-man auger that’s safe, efficient and easy to operate. The lightweight Mechanical Earth Drill packs a punch with a high-speed auger reaching drilling speeds of 360 rpm, providing faster and cleaner drilling than competitive models. We offer various auger sizes, from 1.5-inch-diameter for soil sampling to 16-inch-diameter nursery augers, ensuring your earth drill is properly equipped for the task at hand. The drills feature a steel torque tube to protect users from dangerous kickback, allowing for safe one-man operation for fence installation, planting trees and other landscaping projects.
Sidewalk or Driveway?
We offer two horizontal boring kits which easily pair with the Mechanical Earth Drill by simply replacing the auger with the boring attachments. True to its name, the Sidewalk Boring Kit allows you to quickly bore up to 5 feet under sidewalks, paths or drainage ditches to easily install electrical, water and plumbing lines. Utilizing a 3-inch-diameter auger and wiggle joint extension that are lightweight and easy to install, the Sidewalk Kit allows you to bore underneath the concrete without damage, preserving surface integrity and eliminating the need for restoration and repair.
If you’re taking on a bigger job, the robust Driveway Boring Kit can bore up to 50 feet under wider spaces such as driveways, roads and parking lots. Its extended reach equips you to do more complex underground installations like irrigation systems, electrical conduit or communication cables. The Driveway Kit’s expandable design gives you the flexibility to adjust the setup based on the desired bore length. This kit features a water drill bit, swivel adapter, swivel assembly and a horizontal drill key. To complete the setup, you’ll also need a garden hose, water pipe for the length of the bore plus 15 feet and necessary couplings. The water from the hose runs through the water pipe to flush out the cuttings for a clean result. Like the Sidewalk Kit, our Driveway Kit saves time and money by keeping concrete and asphalt surfaces intact.
More Bang for Your Buck
So, whether you’re a homeowner taking matters into your own hands for those yard upgrades, or a contractor taking on summer landscaping jobs, our horizontal boring kits can turn your Mechanical Earth Drill into a multifunctional workhorse. Instead of needing multiple machines to tackle horizontal boring and drilling jobs, investing in attachments for your earth drill is a cost-effective solution with rapid ROI.
Ready to get to work? Contact us to learn more about how our Mechanical Earth Drill and horizontal boring attachment offerings can save you time and money.
Last updated Mar 27, 2026
There’s a lot of math involved in running a fencing company. Calculating the time required to complete a job, the number of crew members that will be needed on site, how many jobs the operation can take on and the cost of materials is just the beginning to ensure the business will be profitable. Every opportunity to reduce the time spent on the installation process and maximize resources on the jobsite has a direct impact on the bottom line.
A significant line item in any fencing operation’s calculation is its equipment cost. Most residential fence installers invest in an earth drill to speed up the posthole digging process.
This key piece of equipment has a big impact on a fencing crew’s productivity, and, with the right features, this expense can lead to a big boost in the bottom line.
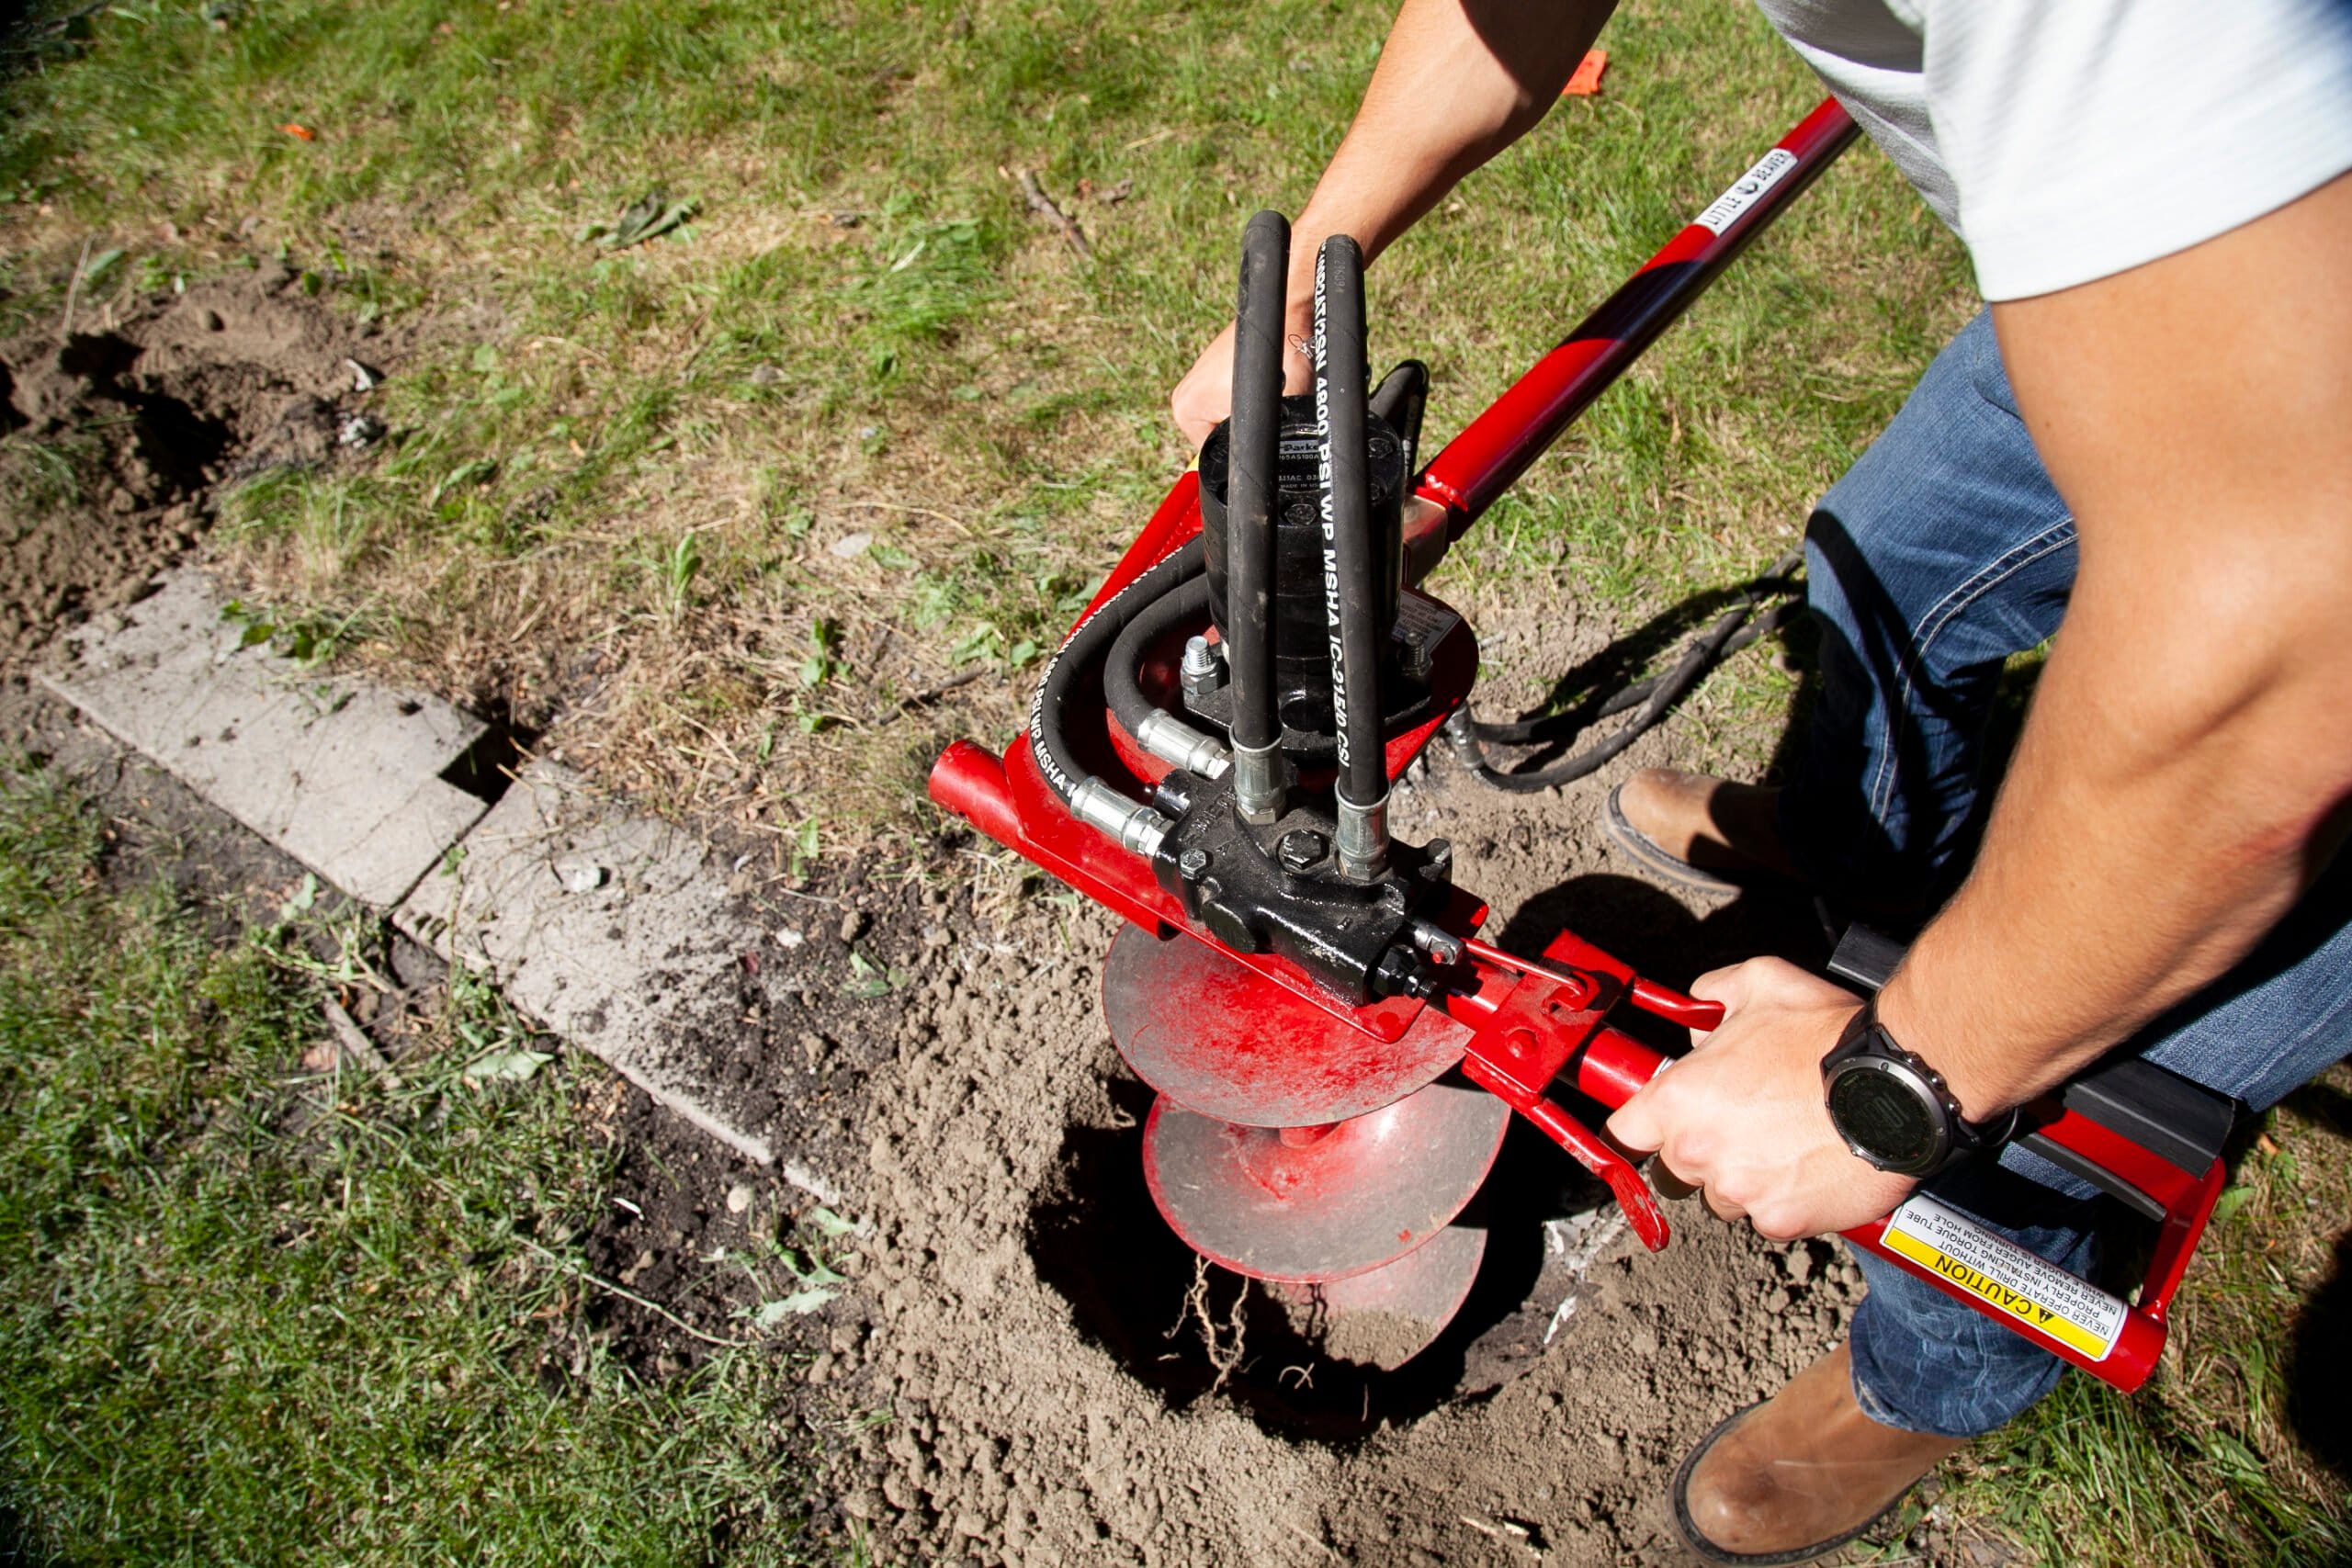
One is Less Than Two
There are many portable earth drill options on the market, but most require two-man operation for safety. When an earth drill hits an obstacle underground, it can jerk and jar the operator with enough force to result in injury. Because this is so dangerous, most drills require two operators to hold the drill steady and combat these effects. However, Little Beaver’s torque tube makes one-man drilling possible with both our Mechanical and Hydraulic Earth Drills by redirecting kickback to the engine carriage as opposed to the handles.
When you can subtract one operator from the drilling process, the labor cost for that step is cut in half. Multiply that by dozens of postholes for a single fencing job and the savings add up. The second crew member can be reassigned elsewhere, such as following behind and placing the fence posts, to optimize the workforce on the jobsite.
Double Drilling Speed
Ready for more math? One of the key advantages of our Mechanical Earth Drill is its operational speed — the auger can rotate at up to 360 RPM. Most other drills can’t meet this speed in a one-man drilling package and it’s common to see competitive drills operating at half that pace.
The Mechanical Earth Drill can create a posthole in less than one minute, cutting down on drilling time and speeding up the installation process. The fast rotation speed also creates a smoother, cleaner hole than other posthole digging options, reducing time required to prepare the hole for the fence post. By cutting back on time spent digging, contractors can complete more projects in less time, bringing additional income into the equation.
Do The Math
The common denominator leading to one-man drilling and increased drilling speed is Little Beaver’s Mechanical Earth Drill. With reduced labor requirements and improved safety features, our earth drills provide both short- and long-term financial benefits.
Calculate your potential savings! Learn more about how Little Beaver earth drills can increase fencing revenue with faster drilling today.
Last updated Mar 27, 2026
Whether you’re a DIY’er looking to complete one simple backyard project or a contractor tackling customer jobs, choosing the correct drill type and auger for a project significantly increases the ease and efficiency of your drilling job. Let’s explore which choices are the best for your project.
Mechanical or Hydraulic?
Depending on the project, you might find that a mechanical earth drill performs better than a hydraulic earth drill. However, the best option comes down to a few different factors including borehole diameter, soil type and maneuverability needs.
Our Mechanical Earth Drills are ideal for drilling relatively small holes, ranging from 1.5 to 12-inch diameters, in sandy or loamy soil profiles. You might use this drill for landscaping, erecting signs or installing fence posts. DIY’ers often find the Mechanical Earth Drill to be the superior option for home improvement projects. With additional kits, these drills extend past simple post hole drilling. Little Beaver Mechanical Earth Drills offer the option to pair with a horizontal boring kit to bore up to 50 feet under driveways, sidewalks and parking lots.
Our Hydraulic Earth Drills have twice the torque of our mechanical models, which makes them better for tasks demanding larger holes up to 16 inches. This could include projects like building a pole barn or monitoring groundwater. These high-powered machines are optimal for use in frozen soil, clay and rocky sediments.
Both earth drill options feature compact, lightweight designs that give them a small footprint and allow them to reach areas where larger models and skid steers can’t go.
Hydraulic Earth Drills can take mobility one step further. Our Towable Earth Drill conveniently attaches to a trailer hitch for hauling to and from the jobsite while the UN-Towable can fit in the back of most SUVs and pickup trucks. They’re also able to drill right next to buildings and other structures. For the toughest jobs, we offer the Big Beaver. Rental centers often choose to stock both mechanical and hydraulic earth drills to appeal to a wider audience of users, including DIY’ers and contractors.
Selecting an Auger
Auger selection can be just as important as drill selection. Roughly 80% of projects will use a standard auger with standard points and blades, which work best in loamy, sandy soil profiles. Typically, these augers range in size between 1.5 to 16 inches, reaching depths of up to 36 inches. Some manufacturers offer additional points and blades that help to expand the use of the standard auger. For example, a carbide blade is best for the toughest types of ground, such as asphalt, dense clay and frozen dirt.
When there’s harsh, rocky terrain underfoot, you need an equally rugged auger. Heavy-duty augers are designed with features like larger flighting and tougher cutting blades. Little Beaver also has heavy-duty points and blades to slice through harder ground, like gravel.
To choose the best auger for your project, it’s important to understand the terrain you will be drilling in. It’s also important to recognize if you’re going to be using the same drill for more than one project. While a post hole might be drilled in an area with loamy soil, a sign might be installed in harsher soil conditions, which will require different auger types and, possibly, different auger diameters.
Making the Best of Your Project
Little Beaver offers an expansive library of informational resources to help you make your project a success. In the FAQ section of our website, you can find detailed answers to questions that may arise as you drill deeper into a project. We’re also happy to have you contact us directly by email or phone.
Last updated Mar 27, 2026
Store Your Earth Drill Properly this Winter
Most contractors and rental centers that employ earth drills will experience an approximately 3-4 month winter period in which the equipment is not being used. Before storing your Little Beaver earth drill for the season, take some time to thoroughly examine the drill and ensure that all components are in working order. The simple steps below will ensure your machine is ready to go in the spring.
Hydraulic Hibernation
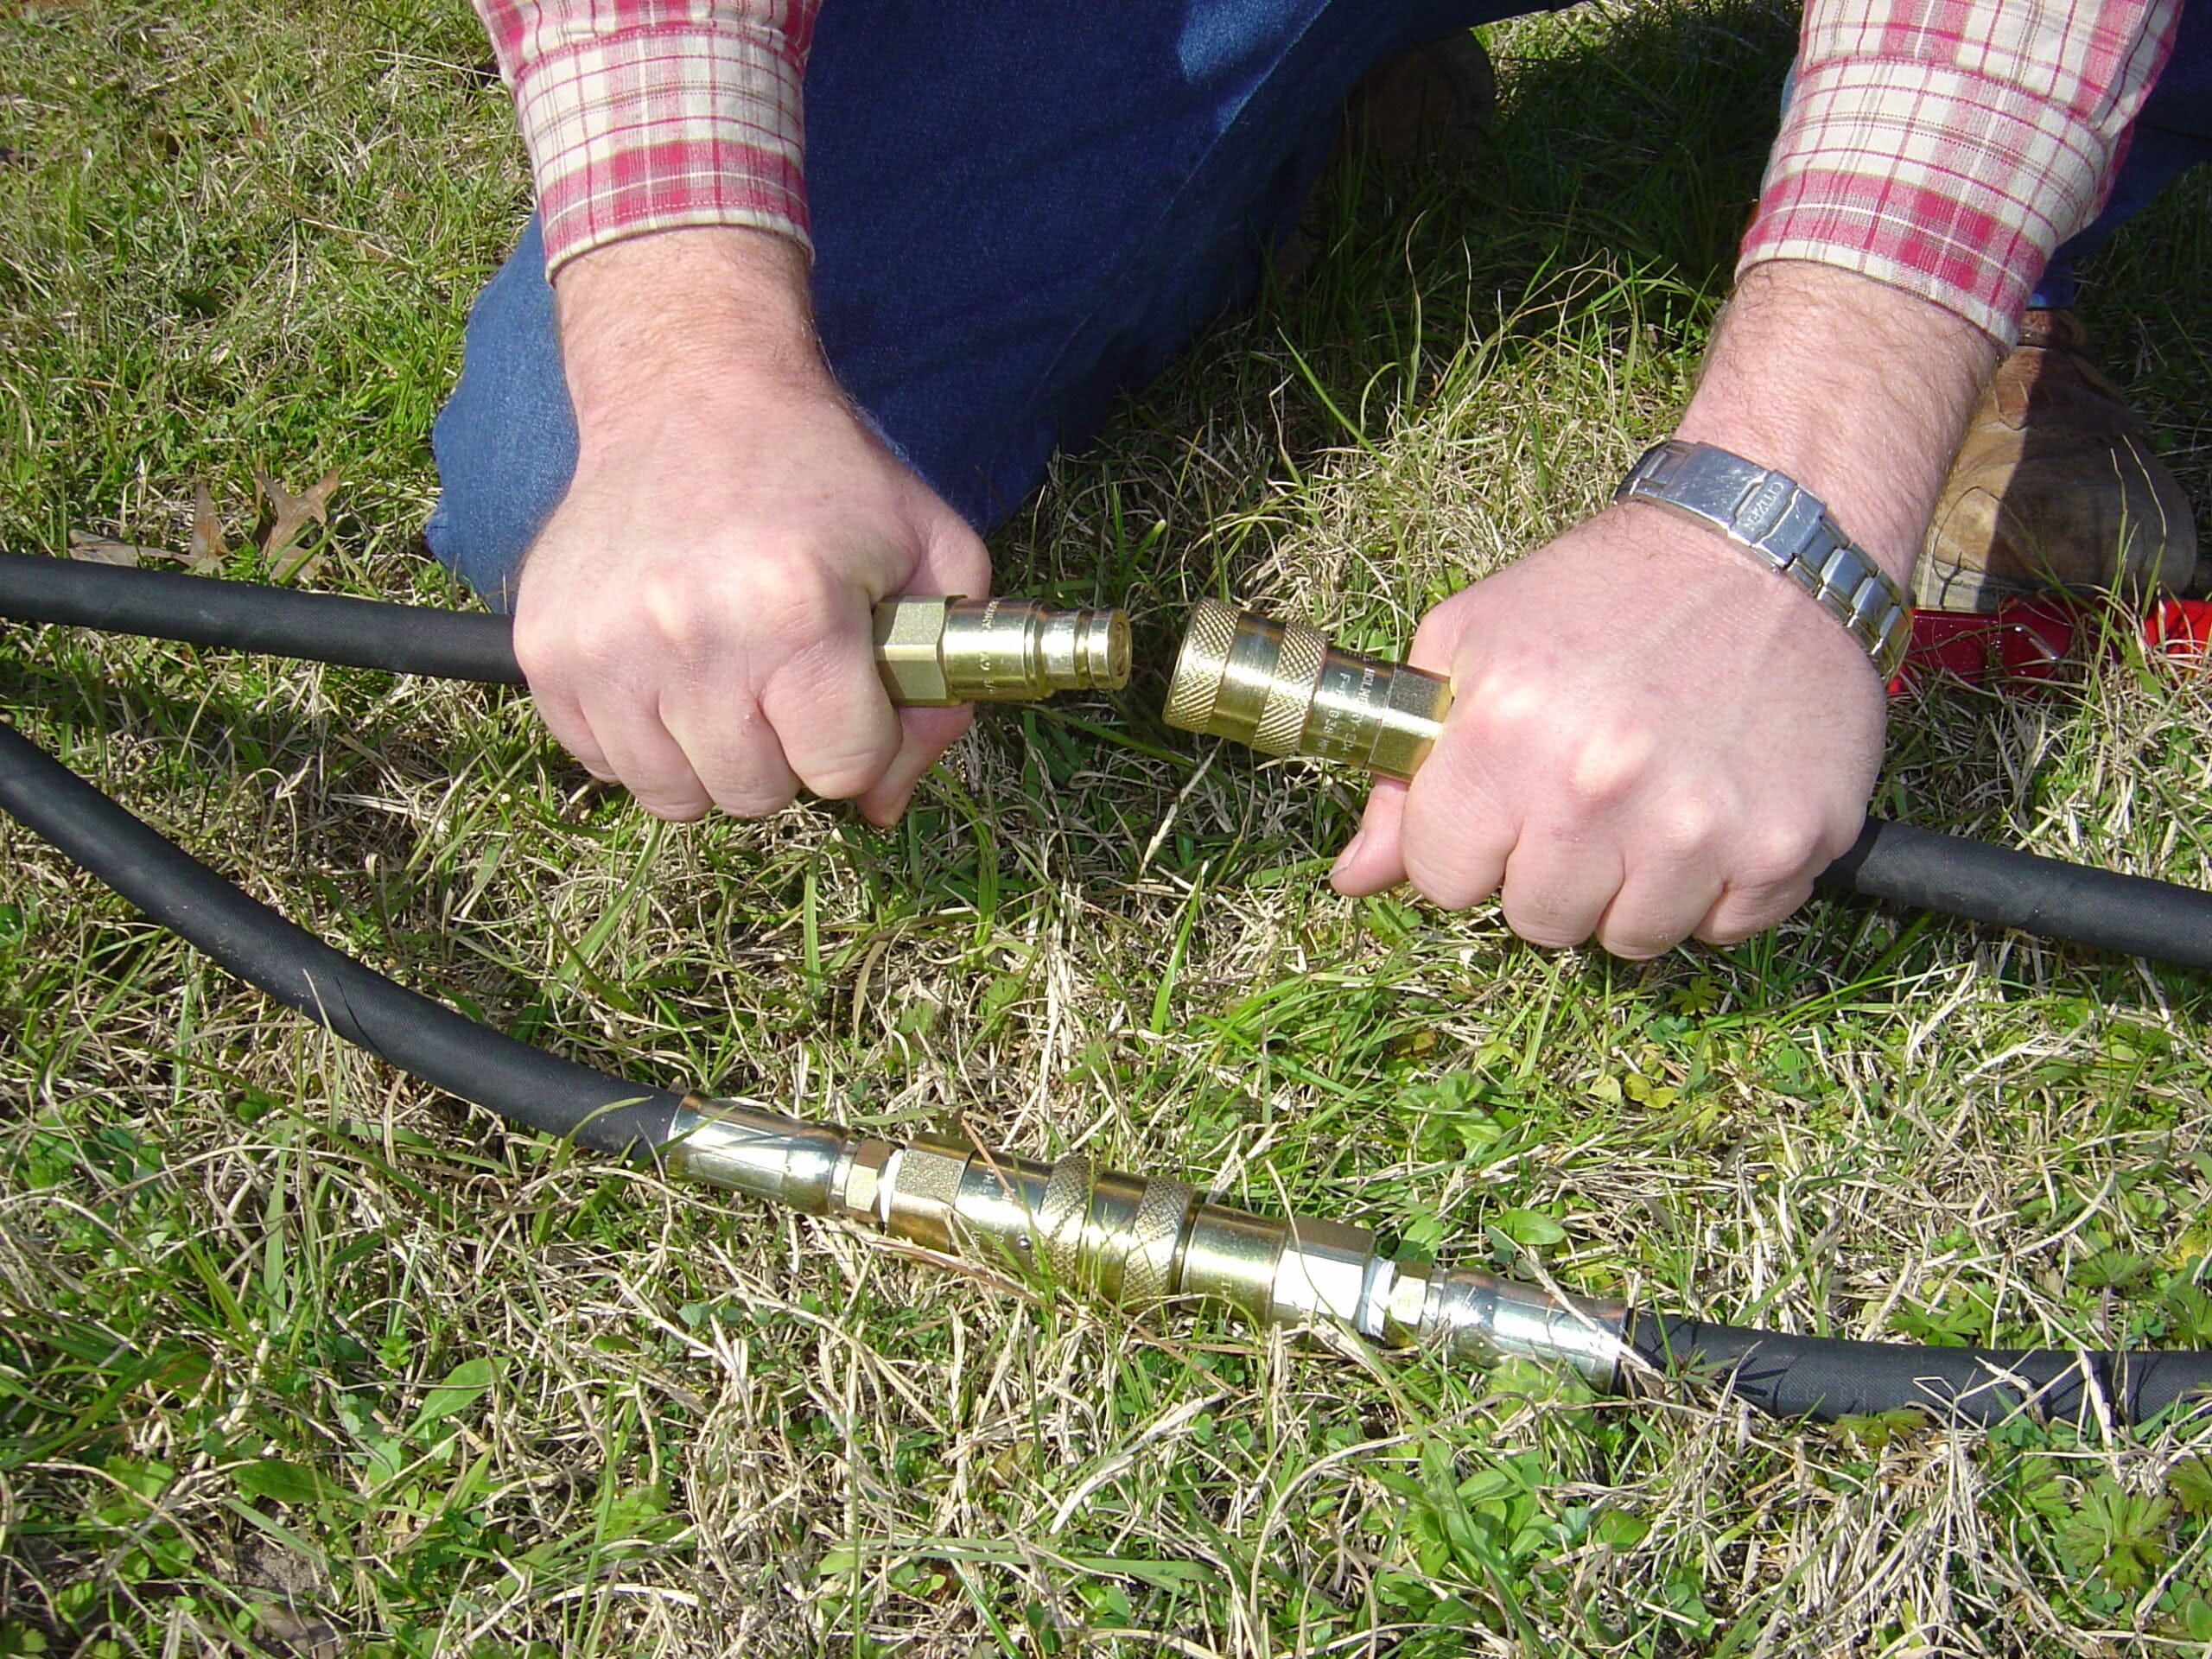
To prepare a hydraulic model for storage, remove the shroud between the tank and the engine to inspect the coupling component. Make sure the rubber spider is not worn or missing pieces. Check for hose leaks or loose connections and look for any cuts or cracks that might be causing them. Additionally, lock the drive head into the “storage” position by pivoting the handle.
Don’t leave your machine out in the cold all winter. Hydraulic oil thickens as it becomes cold, which could damage the hydraulic system and the hoses. The hydraulic oil needs to be changed every three months or 100 hours of use, so it’s more efficient to simply drain the oil for the storage period; just don’t forget to replenish it in the spring. You should use premium mineral oil with anti-wear and anti-foaming additives. If you are using the drill in frigid temperatures, we recommend ISO VG 32-grade oil (46 for normal temperature operation and 68 in warmer climates).
Year-End Mechanical Maintenance
Routine maintenance during active drilling periods of the year keeps your machine primed for the most rugged applications. This includes inspecting, cleaning and lubricating applicable parts for every 30-40 hours of use. But when your drill’s hard work is done and it’s time for its seasonal slumber, ticking off some end-of-the-year checkboxes will make sure it’s ready to go next spring.
Store the drill so that the flexible shaft is stretched straight and not curled up; check for cracks or wires on the outer housing. Look for rust on the push button connector and if you find any, wipe it down with WD-40. Check out the throttle cable as there’s a good chance you’ll need to take things apart to clean it. If frayed, it should be replaced.
Ready for Spring
Some storage preparation steps apply to both hydraulic and mechanical units. There are a couple of options for winterizing the gasoline-powered fuel system of your mechanical or hydraulic drill. The simplest is to completely drain the gas tank. You can also add fuel stabilizer solution, which forms a protective layer by bonding with gasoline to prevent evaporation. It also stops the buildup of sticky resins that can destroy a carburetor and remains effective for up to one year.
Fuel stabilizer is recommended any time a gas engine, especially an older one, will be out of use for three weeks or more. Fill up the rest of the tank upon taking it out of storage, as this will diffuse the stabilizer. Non-ethanol gasoline is best for this type of equipment, especially when putting it away for storage or filling up in the spring. Ethanol’s corrosive effects increase the longer the machine sits idle, and the blend doesn’t always mix well with stabilizer. Once this is done, grab a couple wrenches and tighten up all bolts, as they can become loose through the course of routine drilling and transportation.
Always store earth drills in a warm, dry space. Left to the elements in a high-moisture area, the steel will eventually develop rust. Make sure to keep them in a space that doesn’t get heavy foot traffic so it won’t get knocked over or otherwise disturbed, especially if there is a chance of animals or small children being nearby.
Don’t leave the blades dull or rounded since drilling with them can damage the flighting of your auger. Install new blades if they are replaceable or sharpen your carbide blades. Sharpen with a carbide bench grinding wheel tilted to a 5-7 degree relief angle. Clean your blades with warm, soapy water. Do not use a pressure washer, which is too abrasive and can cause damage.
Your Little Beaver Needs a Little Love
Properly storing your earth drilling equipment will keep it running smoothly for many years to come. For any maintenance questions, reference your owner’s manual, check out our online service videos or contact us for direct consultation.