Last updated Mar 27, 2026
Which Should You Choose?
With all the earth drills on the market that are capable of installing a fence, how do you sort through the options to find the best drill for your specific needs? Little Beaver offers multiple options that appeal to fencers looking for the labor-saving benefits of safe, one-man drilling. While any drill may do the trick, different drills have different strengths depending on the job, and a drill that consistently gives you great performance can help you land more jobs and increase your profitability. Here’s a breakdown of our most popular options for fencing and the jobs they’re best suited for:
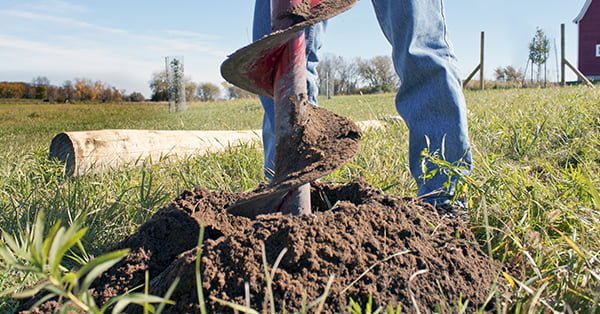
Mechanical Earth Drill
If the majority of your jobs require speedy, one-man drilling, look to our mechanical earth drill series.
Little Beaver mechanical earth drills combine a compact, lightweight design with unbeatable speed and precision. These transmission-equipped units feature high-speed auger rotations and excel in situations requiring numerous posts in very little time. And with optional 13:1 or 20:1 gear ratios, they can take on everything from soft soils to dense, rockier applications.
If you’re looking for more ways to expand your business, Little Beaver mechanical earth drills are compatible with horizontal boring kits, enabling expansion into landscape lighting installation and running sprinkler lines or cable under driveways and sidewalks.
A centrifugal clutch and torque tube truly enables safe, efficient one-man drilling, eliminating dangerous operator kickback and preventing jarring stops when an obstacle is encountered. Additionally, the innovative torque tube redirects torque kickback to the engine carriage instead of the drill’s handles. Other brands of drills reduce performance to accommodate one-man hole digging. But not Little Beaver. We feature all of the power without the inherent risks of other drills.
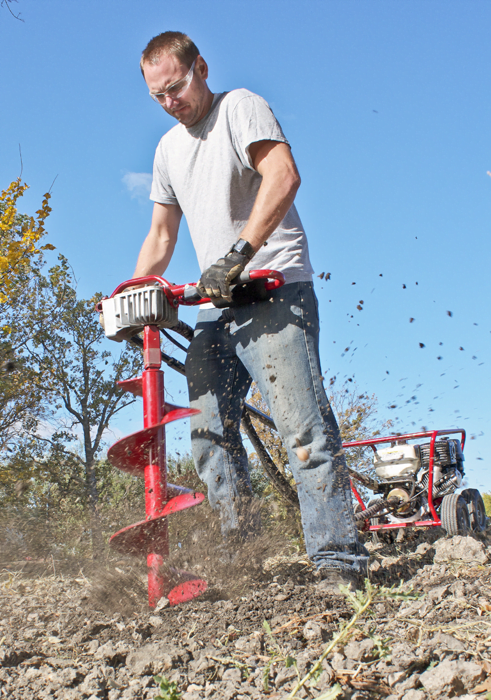
Hydraulic Earth Drill
Despite all the advantages of mechanical earth drills, a season full of drilling a large auger through hard packed clay and soft rock formations may leave mechanical drill owners envying their hydraulic-equipped competitors.
Hydraulic earth drills are your go-to drill for the most challenging soils because of their rugged bodies and powerful torque. Their high torque and precise operation at low speeds allows operators to drill clean, accurate holes, even in the most difficult applications. Hydraulic drills are ideal for drilling wide holes because they have the torque to drive large-diameter augers — some as wide as 16 inches — making them perfect for installing large fence posts, gate posts and any large-scale decorative fencing. Additionally, our hydraulic earth drills have a reverse position so you can safely back-out the auger if it becomes lodged under a rock or tree root.
While hydraulic drills don’t have a clutch to worry about, the operator could be at even greater risk of injury due to the large amounts of torque from these drills. This is where our torque tube is more important than ever as it allows a single operator to safely handle high levels of torque that would be an unthinkable risk with any other design.
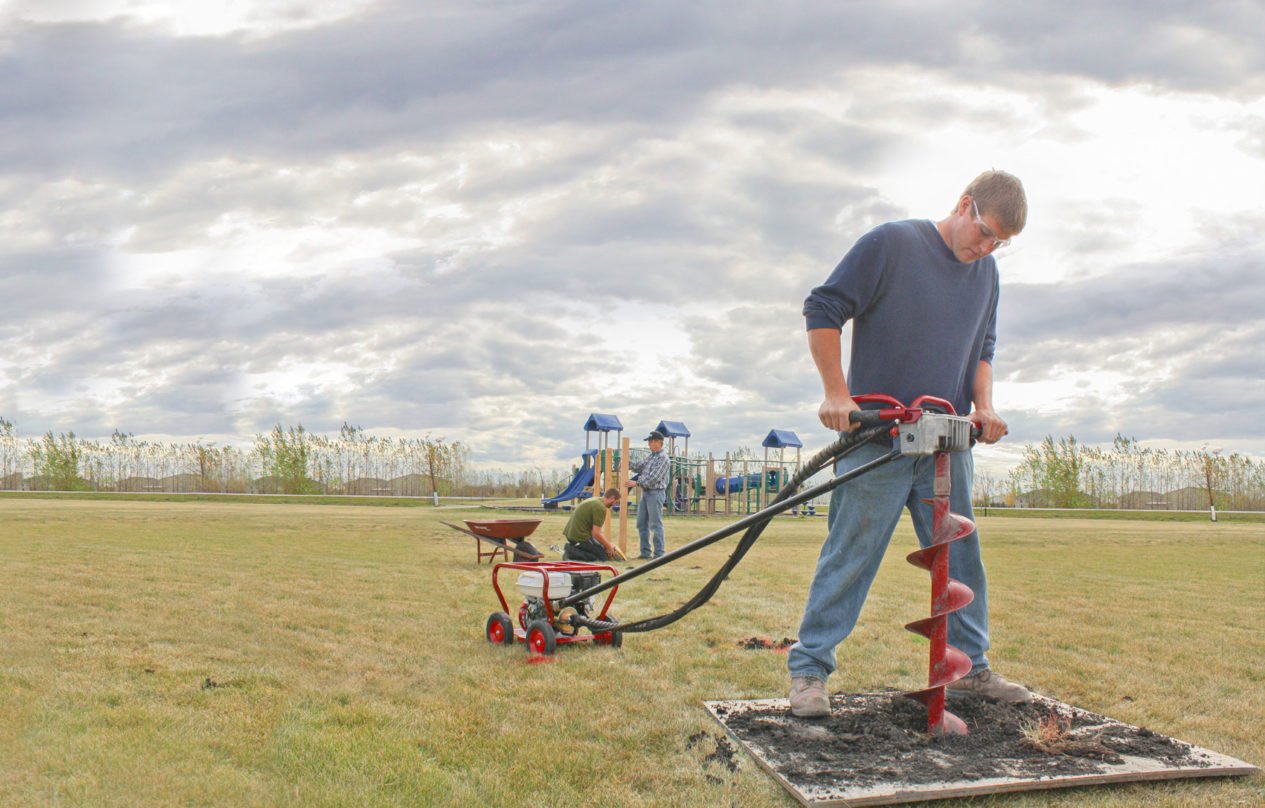
Towable
Do the advantages of our hydraulic earth drills sound appealing for your fencing crew, but you need easier maneuverability and transportation while still maintaining high torque? If so, look no further than our Towable Hydraulic Earth Drill.
Our Towable drill consists of a T-shaped steel frame with highway-rated tires in the center, an 11-horsepower Honda engine located on one end and the auger and controls on the other. The frame balances the weight of the drill over the wheels, making it easy for one person to move, pivot into place and manage when drilling. The wide tires also prevent damage to delicate turf or landscapes.
The design reduces operating weight by roughly 50% compared to traditional hydraulic drills, and it requires less than 20 pounds of force to pivot into digging position. The frame also eliminates torque for safe one-person drilling. The rig can be conveniently towed using a removable “no tools” towing hitch, saving valuable truck or trailer space and making it an economical tool for fencing contractors of any size.
UN-Towable
If the maneuverability of the Towable is just what your fencing operation needs but you require more transportation options and a lighter package, our UN-Towable Hydraulic Earth Drill is the workhorse you’re looking for.
Like the Towable, our UN-Towable operates with a balanced design that makes maneuvering and operation a breeze, but it comes in a smaller package with greater transportability and still achieves drilling specs similar to that of the Towable.
Unlike the Towable, which must be towed behind a truck or loaded onto a trailer, the UN-Towable can be easily moved to the jobsite in the back of a pickup truck or SUV. Alternatively, an optional slide-in receiver hitch offers an additional transportation method. The user-friendly E-Z load bracket is designed to fit in any two-inch receiver, commonly found on most pickup trucks and SUVs. Simply secure the unit in the hitch, crank up the machine until it stops, and insert the pin to lock it in place. This allows fencing crews to carry more and do more without worrying about transportation logistics or expanding their fleet.
Additionally, smaller fencing crews or those needing more flexible transportation will benefit from the UN-Towable’s removable power pack. By detaching the power pack, the overall weight of the drill is reduced by 50%, allowing the machine to be easily transported in two parts.
Fencing can be tough work; don’t make it harder with an ill-suited drill. Consider your crew’s size, typical jobs and future needs to pick a drill that will help you excel at jobs today and give you a greater return on your investment down the road.

Last updated Mar 27, 2026
Pitfalls that Impact Projects Success
Soil sampling is a crucial first step in everything from construction and mining to agricultural applications. Sampling requires accuracy and attention to detail in order to avoid costly mistakes. Whether testing for soil strength, contaminants or nutrients, avoiding these most common pitfalls are vital to the overall success of the exploration.
Incorrect Depth and Sample Size
Testing at the incorrect depth or over too large of an area can provide an inaccurate soil representation as soil nutrient content and strength can vary greatly depending on the depth and location within a site. To ensure accuracy, grid off large sites into more manageable sections that match the specifications of the test order. Next, take multiple samples from each section to compile a thorough soil profile. Pay close attention to the depth at which samples are taken, making sure to match the specs and document the depths.
Ensuring accurate and consistent sample depth can be done manually or with drills capable of automatic options. Manually measuring and marking the depth with each blow or sample can help ensure you’re reaching a consistent specified depth. With manual methods, Little Beaver’s Cathead Kit and weighted hammer are an excellent option, especially when sampling in confined spaces. Additionally, drills equipped with an automatic hammer option combine maneuverability and precise depth control into one package, making it easy to access and accurately sample large areas with varying soil types that require multiple samples.
Cross Contamination
Soil cross contamination is often caused by failing to thoroughly clean equipment between samples, leading to inaccurate readings of the soil. Avoid cross contamination by wiping down and inspecting the auger and sampling tools between each sample. Equipment selection can also help minimize risk of contamination. A Hollow Stem Auger allows removal of the center rod and plug for insertion of a soil sampler The auger provides a natural casing inside the hole to keep out surrounding soil that could compromise the sample.
Not Accounting for Site History
Failure to account for the history of a future construction or agricultural site can result in a soil profile that raises more questions than it answers. A site that has largely been left untouched may have more consistent soil attributes than a site that has been home to various construction projects or agricultural applications. This history can greatly impact how land is divided into sampling areas and where higher soil strength or nutrients are more likely to be found. Take out the guess work by researching before sampling.
Neglecting Site Restoration
Soil sampling often calls for the site to be returned to its original condition once drilling is complete. This can prove to be a time consuming and costly task if improper sampling equipment is used. Compact equipment can be handy and cause minimal disturbance in adverse weather conditions, hard-to-reach sites and sites with limited rig access. The method used to restore a site will vary depending on the environment. At a minimum, holes must be refilled and compacted, asphalt patched if necessary and the surrounding area cleaned of debris. Consideration should also be taken for buried materials such as pipes and underground cables within the sample area. Leaving the site clean and damage free will protect the contractor’s reputation and lead to increased business opportunities.
The first steps in large construction and agricultural projects can set the tone for years to come, making initial and ongoing soil sampling crucial. Whether testing for soil strength, nutrient content or any other critical aspect to your industry, remember that informed and thorough soil sampling is the foundation on which future successes and savings are built.
Last updated Mar 27, 2026
How Innovative Design Can Improve Operator Safety
Fencing contractors have come to rely on high-speed mechanical earth drills for quick hole digging — and for good reason. These powerful machines greatly increase productivity over manual methods, improving profits and ROI. However, some efficiency is lost on increased labor costs and safety concerns directly resulting from the brute force these machines employ. Some companies — like Little Beaver — have made improvements to the design to allow a single operator to drill safely, saving time, labor costs and reducing the possibility of injury to the operator and damage to the machine.
Torque Transfer
One-man drilling leaves the torque generated from a mechanical drill operating at 360 rpm in the hands of one person, a dangerous and potentially costly situation that can leave workers injured, jobs unfinished and insurance claims to be filed. It’s why Little Beaver builds its mechanical drills standard with steel torque tubes to prevent such situations from spinning out of control.
The steel torque tube transfers auger torque and kickback to a separate engine carriage instead of the drill’s handles. Little Beaver makes this possible by mounting the engine on a separate carriage and then connecting the engine to the drill via the torque tube. This makes one-man drilling a safe and efficient reality instead of a potential hazard.
But what happens when the kickback proves too much for the drill?
Centrifugal Clutch
Fence installers know the frustration of hitting tough objects, like roots or rocks, that can abruptly halt drilling at the expense of the operator or the drill itself. Quick changes in torque when drilling can destroy a transmission as easily as it can a shoulder. A centrifugal clutch helps to alleviate these hazards and headaches.
As the torque tube mitigates operator risk by reverting the torque back to the engine carriage, the drill’s transmission now takes on the risk of overloading from all the torque and drilling pressure or damage from encountering a buried object. This is where the centrifugal clutch kicks in. A drill equipped with a centrifugal clutch will automatically slip if it becomes overloaded or strikes an object that cannot be readily drilled through. Pairing this feature with a heavy-duty transmission limits the chances for auger and transmission damage or an untimely breakdown.
A centrifugal clutch, along with the steel torque tube, brings repair cost mitigation and safety maximization full circle. The increased safety of the operator combined with one-man operation and the decreased likelihood of a breakdown equals a smaller and more efficient crew that can take on more jobs.
Intuitive Design
Intuitive design leads to fluid operation. A drill operator shouldn’t need to waste time or focus searching for a switch or changing a cumbersome attachment. Time saving features like snap-on augers and handle-mounted on/off switches on Little Beaver drills help to improve operation, increasing efficiency and potentially saving the operator and machine from unnecessary harm.
There is no formula for increasing the number of jobs completed while decreasing labor input. Such a conundrum takes technological advances to overcome, and Little Beaver has done just that. Fencing crews can now complete jobs with less labor, freeing up time and budget to tackle more work safely.

Last updated Mar 27, 2026
Factors to Consider When Addressing Wear Issues
Nothing ruins productivity like a broken piece of equipment. While that statement may seem fairly obvious, the actions to address problems are not always clear cut. Depending on the severity of the issue, you may be able to get away with a quick fix or repair to extend the life of the machine. But for larger issues, a full replacement might make more sense.
This logic holds true with earth drills just as much as any other piece of equipment in your fleet. There are many working parts to a drill, and while issues aren’t a common occurrence, they certainly can happen. Unfortunately, there is not a guide or rule book to tell you exactly when to repair and when to replace your earth drill. But with a bit of guidance and the help of an expert manufacturer, your decision may be a little easier.
Here are some factors to consider when repairing or replacing your earth drill:
What seems to be the issue?
Some of the most common earth drill issues include an auger that quits turning or turns when it’s not supposed to. If your auger spins while it’s out of the ground but quits spinning as soon as you start to drill the hole, it’s likely a broken flex shaft. The flex shaft should be cleaned and greased after every 50 hours of operation, but sometimes even routine maintenance can’t prevent breakage. A broken flex shaft can’t be repaired, and usually costs about $600 for the part and up to $100 for installation. In some cases, just replacing the inner core will fix the problem for around $200.
Gearbox issues are a different story. An issue with the gears or the gearbox prevents the drill from spinning altogether. While low motor oil can cause the motor to lock up and cease functioning, there’s also the possibility of a larger issue, such as the gears being stripped. Gearboxes can be repaired, but can cost nearly as much as a full replacement – a comparison of about $725 to repair or $850 plus installation costs to replace.
If the auger spins at idle, the diagnosis is likely the clutch. The auger shouldn’t spin until you depress the throttle and engage the clutch. If the clutch is overheated during operation, the heat-treated springs will no longer keep the shoes from engaging, causing the auger to stay engaged at all times. Similar to the gearbox, the repair cost nears the full replacement cost – a comparison of about $140 and $160 plus installation costs for a new clutch.
If the auger vibrates excessively or “walks” during use, it is likely due to misalignment or wear of the points and blades. Blades should be replaced when worn flush of the auger flighting. If the blades wear into the auger flighting, the auger will need to be repaired or replaced. Points should be replaced when the split or fork in the tip is less than ¼” from the bottom of the split.
What would a replacement part cost?
The cost of parts varies among manufacturers. A general statement of advice is that if the replacement parts cost more than 50% of a new drill, it might be best to invest in a new unit. Keep in mind though, don’t just look at the sticker price. You should also include the labor and cost of lost production, as well as the age of the equipment.
Common replacement parts like the flex shaft and the gearbox can add up to a significant dollar amount. In fact, if both need to be repaired at the same time, it can cost almost 50% of a new drill. While it’s not common for these two parts to break at the same time, it can happen if an operator hits an obstacle while digging at a fast speed.
If two or more parts need to be replaced at the same time, you may be better off replacing the entire drill. However, making the repairs and rebuilds yourself can be a more financially feasible option for those with the experience and tools to do so.
Can you fix it yourself?
Hiring someone to fix your equipment is often a logical choice, as it alleviates the effort required on your part. However, when you take this route, it’s important to factor in repair costs and time that is outside of your control.
The alternative – fixing it yourself – doesn’t have to seem like a daunting undertaking. Many manufacturers have resources to walk you through the process. Little Beaver offers service videos that address common repairs and maintenance questions. It might seem tempting to pay someone to fix your drill, but educating yourself on the components and repair process can save you time and money in the long run. If someone on your staff is mechanically inclined, they should be able to tackle the repairs.
In what application do you use the drill?
If you’ve got backup drills in your fleet, waiting for a repair might not be an issue. But for contractors who rely on the unit on a daily or even weekly basis, being without it could result in lost revenue. In the summer, especially, many local lawn and garden repair shops are backed up for 6-12 weeks, which is not a feasible wait time for many people. Depending on how long you’ve owned the machine and what industry you’re in, the decision to repair or replace might make more sense.
Rental
In the rental industry, only drills that operate bring in revenue. So if repairing a drill would take time, replacing it might be a better option. If time is the greatest concern, consider purchasing a second unit as a back-up and additional revenue source until the original drill is fixed.
In the rental industry, appearance of equipment is a large deciding factor for customers. Replacing a worn-out drill with a shiny new one might make more sense for the fleet. If turning inventory is on an annual or 18-month requirement, the chances are low that something would go wrong and require a full replacement before that time. In other instances, a rental center might repair a drill for 20 years. The criteria is different for each business, so make sure the cost and the results make sense for your store.
Fencing
In the fencing industry, it’s important to have a large enough fleet to change out drills if one needs repairs. Fencing contractors likely have more than one drill in their lineup, so taking one out of commission to get it repaired shouldn’t affect productivity. For many contractors, incremental costs broken up monthly are a more feasible option than a single, larger payment. But, it’s important to consider the cost of each of those repairs. Consider the overall age of the drill and how many key components could be showing that age.
What is the age and condition of the drill?
If a drill is maintained well and taken care of, it should last many years. There’s no rule that says “after 10 years or 10,000 hours of use, the motor will go out,” so it’s important to keep an eye on the machine. If a drill is rented out and used for 20 hours a week, it would likely require less maintenance than a fencing contractor who uses the drill 40 hours a week.
When considering repairing or replacing your drill, you’ll want to consider the overall health of the engine. If the engine is older and experiencing issues, replacement might be more logical however, if the engine is a rebuilt system and virtually like new, repair makes more sense.
Making a decision
If you suspect something is wrong with your drill, address it right away. If issues aren’t fixed in a timely manner, they can have a domino effect and create more damage. Taking care of one component right away can save time and hassle and prevent other issues.
Also, it’s important to remember that if you decide to purchase a brand-new drill, keep your old one on hand for replacement parts. Over time, it might be a good idea to fix up the old drill to use as a backup, too.
It’s hard to provide a cut-and-dry guide to repairing or replacing your equipment. The manufacturer can likely provide advice on your particular situation, so give them a call if you need help with the decision. Addressing problems and repairing or replacing your earth drill will help bring your operation back to maximum productivity.
Last updated Mar 27, 2026
Keeping Safety in Mind Before Starting the Job
Whether you’re using a hand shovel or an excavator, an earth drill or a trencher, a hole is a hole and there are several safety precautions that come along with a digging project. Sharp tools present the opportunity for dangerous situations, let alone combined with the power of a mechanical or hydraulic rig. Choosing a safe machine, calling before you dig and operating the machine according to manufacturer recommendations are all things to consider before starting. Keeping safety in mind before starting any job is crucial to avoiding injuries, some of which can be serious.
Select a Safe Drill
Choosing a drill with safety-enhancing features can make or break a project. No matter what kind of drill you’re looking for – mechanical or hydraulic, a larger rig or smaller piece of equipment – there are certain features to look for to ensure the safest operation.
First, make sure the drill has a torque bar. This addition protects operators from the harmful effects of a drill’s torque by transferring kickback from the auger to the power source. By distributing force to the engine carriage as opposed to the handles, one person can safely and comfortably operate these drills. In addition to protecting the operator from harm, torque tubes reduce operator effort and fatigue.
Torque tubes are the only way to ensure safe operation of a one-man drill. The torque tube eliminates the kickback common with competitive earth augers, making one-man drilling safe, fast and productive. Many two-man drills exist, but if they’re not operated correctly, they present a handful of potential issues. If one operator slips or lets go, the other operator risks being thrown and injured. A one-man earth drill is designed to be a safe and efficient piece of equipment.
Additionally, mechanical drills are often equipped with a centrifugal clutch. If the auger encounters an object beneath the surface or if it’s overloaded, the clutch automatically slips to protect the operator from serious injury.
Call Before You Start
 Calling before you dig can be the difference between smooth sailing and a potential disaster. There are millions of miles of buried utilities below the surface, including gas lines, underground sprinklers, sewer pipes and more. Buried gas or power lines are the most dangerous, with the potential for electrocution, fire, severe burns or even fatalities. Always call the national diggers hotline at 811 at least 48 hours prior to digging to have underground utilities marked. When the inspector arrives, pay attention to the details since state laws differ when it comes to how long your permits are valid and what the paint or flags indicate. There may be multiple utility lines to be aware of.
Besides underground utilities, you should have a general idea of what lies below. Fill material, wood, rocks and more can be hiding underground. Take a good survey of your site beforehand. Not only does this provide another level of safety, but it helps you make a decision on which kind of drill bit to select.
Operate Safely
After you’ve equipped yourself with the safest drill and underground utilities have been marked, it’s time to start your project. If you’ve chosen a one-man drill, it’s important to operate the drill alone, as the handles are designed for a solo operation. Bystanders should be at least 10 feet away, and everyone should be wearing hard hats and safety goggles.
Avoid loose-fitting clothing, including gloves. If work gloves are too loose, they can hinder your ability to appropriately operate the drill. Wear work boots or quality athletic shoes, avoiding hanging shoelaces that could get caught in the auger.
Once the auger is running, position it perpendicular to the ground for the best possible control and optimal results. Touch the auger to the ground before you start rotating. For the best control, adjust the downward pressure based on the soil conditions. If the soil is soft, ease up slightly. If the ground is harder, apply a little more pressure, but not so much that rotation slows or stops.
Once you’ve reached the desired depth, there’s a proper procedure for safely removing the auger from the ground. Release the throttle control and allow the auger to come to a complete stop. Once the auger has stopped turning, it can safely be removed from the hole. Hydraulic rigs feature a forward/reverse lever to make it easier to lift the dirt out. This allows the operator to ease the drill out of the ground as opposed to tugging heavily on the equipment, greatly minimizing the physical effort required to get the job done.
By following a few easy steps, you can ensure your drilling operation is safe, efficient and injury-free.