Last updated Mar 27, 2026
Hydraulic Earth Drills Offer Speed and Precision
When strong winds blow, a mobile home needs additional protection. No matter the geography, anchoring a mobile home typically involves installing tie-downs and anchors to secure it to solid ground. It’s essential to complete the anchoring process soon after positioning the mobile home on the lot.
Traditional methods to anchor a mobile home involve a pipe thread machine powered by a generator. This system is expensive, as well as slow and cumbersome, resulting in several hours of work to anchor a single home. Hydraulic earth drills simplify the process and eliminate back-breaking labor. Little Beaver hydraulic earth drills offer the mobile home anchoring process two substantial benefits, speed and precision. By pairing the drill’s earth auger with Little Beaver’s anchor adapters, you’ll install each anchor in less than a couple of minutes and complete an entire home in as little as 90 minutes. And Little Beaver’s hydraulic drills feature a reverse position that makes removing anchors as easy as installing them.
Five easy steps to anchoring a mobile home:
- Rent or buy a Little Beaver earth drill from a local rental center or dealer and gather the essential equipment, including Little Beaver’s mobile home anchoring kit, anchors and steel straps.
- Determine where and how many anchors you’ll need to install around the home’s perimeter. Depending on state laws and regulations, you’ll need to install anchors at 2- to 5-foot intervals, so the number of required anchors can vary. Unlike other models on the market, no predrilling is required.
- Snap Little Beaver’s anchor adapter on to the drill’s high-torque handle and fasten the 3-foot anchor with an adjustable wrench or ratchet.
- Start drilling the anchor into the first location until only a few inches of it is above ground. Continue this process around the mobile home.
- Fasten steel straps around the mobile home’s frame and attach them to each anchor with adjustable bolts.
It’s best to check anchors and straps periodically after installation, as well as before a major storm, to ensure each is secure and free from rust or cracks. Keeping fertilizer away from the anchors and straps prevents rust.
For more information about tying down a mobile home and the equipment needed, contact us. For questions on anchoring, contact an experienced installer or building inspector.
Last updated Mar 27, 2026
Hydraulic Earth Drill Maintenance
It’s easy to neglect little things we should do each day, like eating breakfast, drinking enough water or flossing our teeth. We tell ourselves it’s not a big deal if we forget, but doing so affects our overall health in the long run.
The same goes for hydraulic earth drill maintenance. Since hydraulic drills withstand extra tough conditions and have few moving parts, we assume we don’t have to worry about checking them often. But misuse and irregular maintenance significantly impact the health of a drill.
Neglecting hydraulic drill maintenance can lead to declined performance or, worse yet, a complete breakdown during hole digging projects. Keep your drill healthy by paying attention to these hydraulic wear parts.
1. Hydraulic Fluid & Motor Oil
Before starting the engine, check that the power pack’s hydraulic oil reservoir is filled to the top of the sight gauge. Keep the hydraulic oil and return line filter clean at all times, and change both after the first 15 hours of operation. From then on, change the filter and oil every three months or after 100 hours of operation.
Along with the hydraulic fluid, check the engine crankcase oil levels and ensure that all nuts, fasteners and fittings stay tight. A loose engine or tank mounting bolts can cause premature wear.
2. Quick Disconnects & Hoses
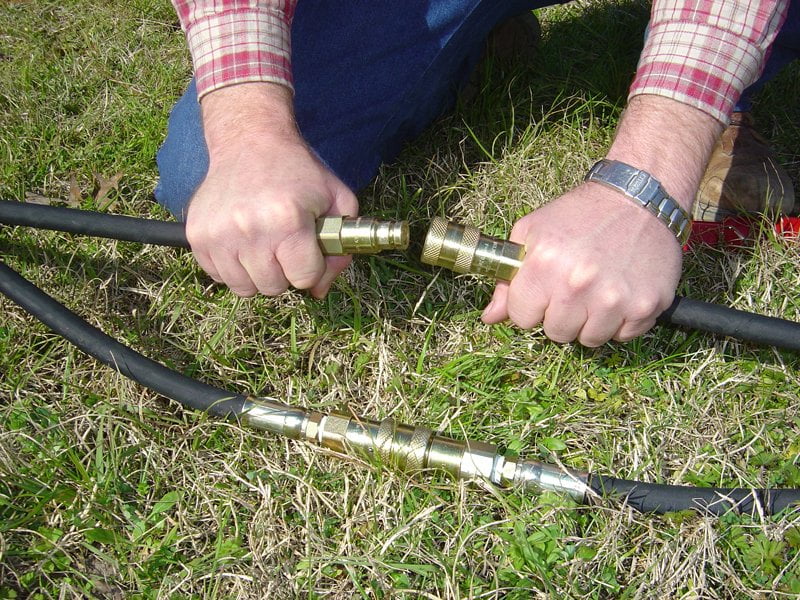
Regularly clean the hoses’ quick disconnects before and after drilling. After a job is complete and you begin to take the drill apart, attach the disconnect from the drill’s hydraulic output hose onto its input coupler and vice versa on its power pack. This prevents dirt from getting inside the hydraulic system. If one of the quick disconnect fittings begins leaking, the quick disconnect coupling needs replacement.
Examine hydraulic drill hoses and pipes for leaks, cracks and abrasions and replace if necessary. Keep hose connections tight and fitted for optimum performance.
3. Other Wear Parts
- Replaceable Points and Blades on the Auger: Your earth auger’s points and blades need replacement if dull or worn. Always check before and after drilling each hole. If a worn blade isn’t replaced it might damage the auger flighting, which requires either a costly repair or a total auger replacement.
- Torque Tube: Inspect the tube for cracks before each use. Check that the spring-button attachment is securely snapped into place and replace the attachment if it is bent or broken.
- Control Valve: If operators encounter any hydraulic oil leakage, they should shut down the power source and relieve the hydraulic pressure by moving the control valve in both directions, which opens the hydraulic oil flow. Tighten the screw-on fittings on the end of each hose. Replace the related hose assembly if the leakage continues. If the control valve leaks around the spool shaft, replace the seal kit.
When putting drills away for the off-season, remember that proper storage contributes to overall maintenance. Drain the gas or put recommended additive in the fuel, whichever the manufacturer suggests. Always store the drills in a dry place because the steel components will eventually rust if left outside or in places with a lot of moisture, such as propped up outside against a building.
Regular maintenance prolongs the life of your digging equipment, boosting your productivity and efficiency. If you have a maintenance issue or question, make sure to reference Little Beaver’s online parts and operators’ manual, online service videos or contact us for in-house technical consultation.
Last updated Mar 27, 2026
What You Need to Know About Deck Footings
Nothing says summer like a backyard barbeque on your new deck. When built correctly, the deck can be a hot spot for many backyard escapes and a refuge for enjoying perfect summer evenings. But it all can come crashing down if the deck doesn’t have proper footings.
Footings support the deck’s weight at different points in the ground, creating a crucial support network that prevents problems, such as sagging and wood rot. Those problems not only make your deck unattractive, but unsafe as well. And to fix them as they surface taps your savings and generates unwanted stress. Without proper footings, the deck will sink into the ground, taking with it any future summer get-togethers.
Laying the Groundwork
When starting a new deck project, choosing the correct footings boils down to two things, loads and codes. The first step you should take is to determine the deck’s size, location and layout. After getting a general idea of what you want the deck to look like, think how will you use it. Will it be the next venue for the neighborhood block party? Or will it be for intimate gatherings of family and friends? Based on your answer, your deck will have different footing requirements because of the weight requirements.
Local building codes also determine the footing style and measurements. Building codes can vary state to state, so it’s crucial to contact local government experts. They can provide information regarding the minimum number of footings needed, spacing requirements and even how deep to dig. For instance, holes need to be dug below the frost line, which can range anywhere between 12-60 inches, depending on where the project is within the U.S.
The Digging Commences
After securing the necessary building permits from city hall and locating underground utility lines, it’s time to dig. When it comes to bringing heavy duty equipment through your yard, let’s face it. You’re not thrilled about skidsteers leaving ruts in your soft, green grass, and fences and narrow side yards limit what type of equipment can even reach the worksite — commonly forcing homeowners to seek out hand augers and mechanical drills.
Mechanical earth drills, which can be rented from a local rental business, can get to the site, not to mention save time when digging deck footings. These earth augers can cut through different soil types, dig clean, consistent holes and quickly set up the beginnings for the perfect deck. Earth drills are compact and offer multiple types of digging teeth depending on the types of soil you have.
Additionally, mechanical drills are more portable than heavy machinery. For instance, some drills feature pneumatic wheels so a single person can pull the drill and carriage to the footing location without forming lawn ruts or dismantling fences. Some manufacturers build models with torque tubes that transfer digging torque to the engine carriage, which allows one person to safely operate the drill. Once in place, the user can drill to the required depth and quickly move to the next footing location.
After the footings are placed and the concrete has set, you can continue building the frame for the deck that will be the hot spot next summer and for many more to come.