One Man Earth Drill Operation

One Man Earth Drill Operation

Little Beaver Earth Drills are designed to be safely operated by just one person. What does that mean for your business? More efficient labor utilization. Faster job completion. Fewer injuries. More profit on every job.

Check out the infographic below to learn how Little Beaver Earth Drills can double your productivity and maximize jobsite safety.

Little Beaver One Earth Drill Infographic
The Invention That Tackled Torque

The Invention That Tackled Torque

One-of-a-Kind Feature Improves Operator Safety

In the mid-1970s, Van Cox set out to solve one of earth drilling’s most punishing problems — auger torque. Cox, an engineer for Little Beaver, soon completed a design and secured a patent for what is now known as the torque tube. The one-of-a-kind invention protects operators from the harmful effects of a drill’s torque by transferring kickback from the auger to the power source.

More than 40 years later, deck builders, fence contractors, landscapers and rental customers continue to enjoy torque-free drilling as well as the labor-saving benefits made possible by safe, one-person drilling.

Mechanical earth drill torque tube

By transferring dangerous kickback to the engine carriage as opposed to the handles, one person can safely operate a Little Beaver drill.

The invention remains a defining feature on Little Beaver’s of mechanical and hydraulic earth drills, and it continues to make life easier for business owners and drill operators thanks to the many benefits of torque-free drilling.

Less Manpower: By transferring dangerous kickback to the engine carriage as opposed to the handles, one person can safely operate a Little Beaver drill. Most drills without torque protection require two operators for safe use. One-person drilling frees up the second individual to work on other tasks so jobs are completed in less time.

Fewer Strains: Kickback on traditional drills can jar an operator’s body, causing strains and injuries, which lead to time off and worker’s compensation costs. Even minor injuries, ones that don’t result in time away from work, can slow individuals down, decreasing overall production.

Easier Use: Since the torque tube absorbs kickback, operators don’t need to work as hard to control the machine. This significantly reduces fatigue while allowing operators of any age or experience level to easily handle the drill.

If you’re still not convinced of the benefits of Van Cox’s invention, see Little Beaver’s solutions for yourself.

To The Next Yard And Beyond

To The Next Yard And Beyond

Hydraulic earth drill tree planting5 Ways Earth Drills Increase Your Productivity

Never let poor productivity of handheld equipment and the risk of disturbing the turf with skidsteer tracks slow down your landscaping business. Whether you’re installing fence posts, planting trees or soil sampling, using an earth drill helps you work faster with minimal impact to the customer’s lawn. Here’s how earth drills maximize your productivity.

  • Features that protect the operator and equipment also save your budget.
    Paying workers’ compensation, or shop repairs can have a huge impact on your bottom line. Avoid dangerous kickback to the operator with a steel torque tube on mechanical and hydraulic models. The torque tube transfers drilling torque from the drill head to the engine carriage, virtually eliminating the risk of kickbacks to the operator as well as damage to the transmission and drive cable. Traditionally, contractors used two-man hole diggers, but choosing a model with a torque tube cuts labor costs in half. Another safety feature found on hydraulic units is a pressure-relief valve to stop the machine if hydraulic pressure reaches unsafe levels. More safety and less downtime equals greater productivity.
  • Accuracy and speed are fundamental for completing more projects.
    Manually digging holes is a tedious and inefficient process. Drill several feet deep in seconds rather than minutes with Little Beaver’s mechanical and hydraulic drills. Mechanical drills achieve speeds as fast as 360 RPM and hydraulic drills reach 285 RPM.
  • Little Beaver hydraulic drill torque tubeComfortable and convenient features lead to more productivity.
    Avoid throwing the towel in early due to operator aches and pains. If you hit an obstacle, hydraulic earth drills feature a comfortable one-touch reverse control to help you back out without having to manually lift the dirt and auger on your own. And, padded handles, easy access to the throttle controls and on/off switches on mechanical and hydraulic earth drills ensure a comfortable operation.
  • Simple maintenance equals less downtime.
    Easy servicing ensures that equipment is always ready to go and helps protect your equipment against wear. An earth auger with easily replaceable and reversible points and blades keeps the project running smoothly by cutting through a variety of soils and extends the auger’s service life.
  • Easy maneuverability is key to getting around the worksite.
    Bulky equipment, such as skid steers, are difficult to maneuver through tight spaces and might require following up with handheld tools to get the job done, which can eat up valuable work hours. Compact mechanical or hydraulic earth drills with wheeled power sources, on the other hand, easily access narrow side yards. The pneumatic tires, coupled with the drills’ light weight, prevent lawn damage and make them easy to move. Save valuable truck or trailer space for hydraulic earth drills by using a 2-inch ball hitch for transporting. Or, for additional hauling options, cut the weight in half by unhooking the removable power pack for easy loading and unloading.

Here are some products that can help you be faster and safer as well as grow your job list. Have more questions? Contact us.

Hit a Home Run in Fence Construction

Hit a Home Run in Fence Construction

4 Tips for Building the Perfect Fence

Mechanical earth auger for fencepost installationYou’ve become an expert in landscaping throughout the region. From planting trees and flowers to installing decks and curb edging, you’ve completed many projects for satisfied customers. Now it’s time to step up your game and add fence installation to your services.

Let these fence-building tips lead you to success.

1. Get Answers.
Start like you would with any project, by working with the homeowner or business owner to establish the size, scope and specifics of the project. To do this, always have a set of questions ready that will get to the heart of the project. What kind of fence does the customer want? What will the layout be? Where do they want gates? How high should you build it?

Check with city building codes and, if applicable, neighborhood association rules, so that the fence specs meet all of the codes. If the city assessor has not surveyed the property recently, you’ll want to coordinate that to ensure the fence is built in the proper location and, depending on the area, you may need a permit. Call 811 a few days prior to digging to have utility companies mark underground utility lines, gas pipes and sprinkler systems.

2. Get Your Tools.
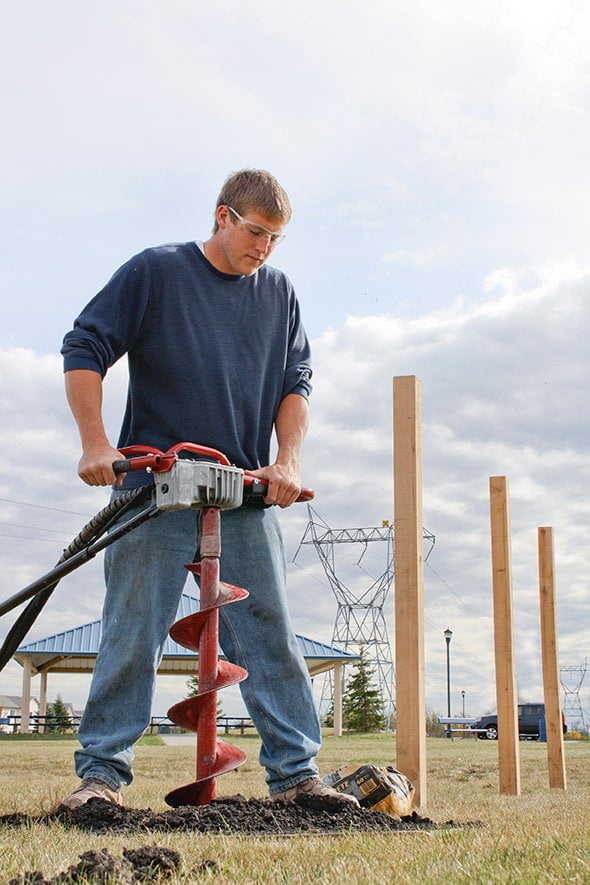
Selecting the right hole digging equipment will help you finish on time and on budget. If it’s a small project, you might use a hand-held posthole digger. If you’re doing more than a dozen holes, though, it will be slow work to muscle each hole clean. To tackle bigger or multiple projects, you’ll want the speed and ease-of-use that comes with an earth drill. A Little Beaver mechanical one-man or hydraulic drill can bore each hole in less than a minute with little effort. It’s equally important is to make sure you select the correct auger, points and blades for the soil type you’re working in. This will help you dig holes faster with less pain.

3. Get it Straight.
You can’t get a straight fence without evenly spaced holes and firmly set posts. Set the spacing by marking and digging all corner and gate post holes first. Run a string from corner to corner and then measure the post spacing along the line.

For chain link fences, space postholes no more than 10 feet apart. For wooden fences, posts usually stand 6 to 8 feet apart. If installing posts in soft soils or windy areas, use a hand posthole digger to flare out the hole, creating a bell shape for more stability. The hole diameter needed is based on the size of the post used. For instance, a 4-by-4 post requires an 8-inch diameter hole. This can be easily achieved with Little Beaver’s snap-on augers that range in diameter from 1.5 to 16 inches. Holes are typically 24 inches deep, but you’ll need to ensure the depth is 3 inches below the frost line to prevent posts from cracking in the frozen ground. In some parts of the northern U.S. and into Canada, that means going as deep as 4 feet. If you’re in windy areas or sandy soil, you may want to dig your posts even deeper.

4. Get the Concrete.
Position the posts so that they are the correct height and plumb; even the slightest lean can create a slanted and potentially unstable fence. Next, shovel concrete into each hole. Avoid touching the post, which could cause it to move. Choosing concrete rather than a dirt and gravel mix will give the fence better stability. Allow 24 hours for the concrete to set, and then attach the chain link fabric or wood framing and face boards. With both types of fences, complete the gates last.

Once you’re done, it’s an ideal time to touch base with your customer on fence maintenance and landscaping recommendations. A job well done here can translate to more work, whether from this customer or referrals, as you continue to expand your landscaping services.

Feel free to contact us for further fence-building tips; or general questions on our full line of augers, one-man earth drills and two-man earth drills. We’re always happy to provide the tools and assistance you need.
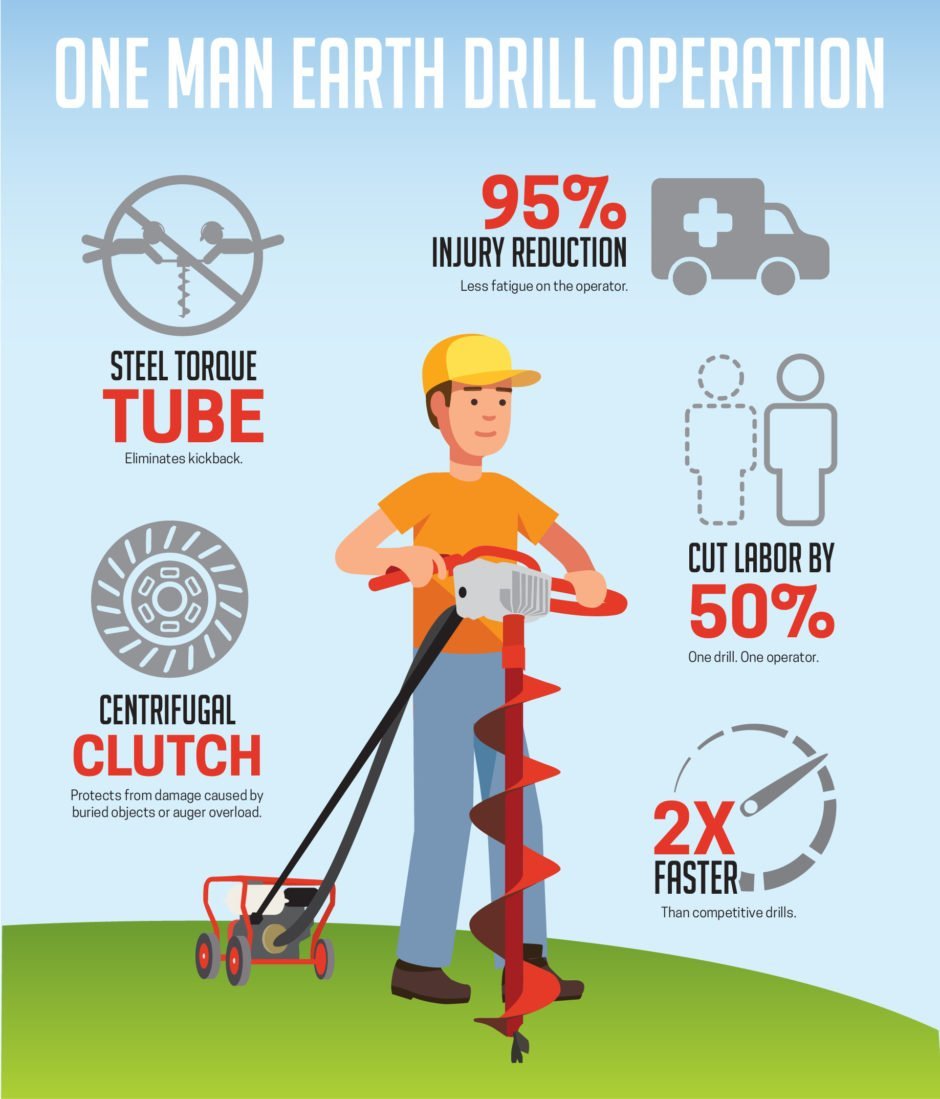