Last updated Mar 27, 2026
Stay a Step Ahead of Your Drill’s Maintenance
Routine preventative maintenance is crucial. It boosts uptime and ROI for earth drills, which means faster project turnarounds and hassle-free hole digging — all while reducing your service costs.
To help you stay a step ahead of your drill’s maintenance, our Little Beaver team created a video series that aims to reduce downtime and increase service life for your equipment. In addition to step-by-step maintenance instructions, the videos provide information regarding best practices and tips for getting the most out of your drill.
Our videos address the most common issues encountered with Mechanical and Hydraulic Earth Drills and provide in-depth troubleshooting advice.
Last updated Mar 27, 2026
Minimize Downtime with Proactive Maintenance
A little maintenance work goes a long way to decrease costs, expand the lifespan and enhance the power of your earth drill. Contractors choose our Mechanical Earth Drills for high power in a variety of applications such as fence installation, deck installation or landscaping. Like most equipment, a mechanical drill requires simple, routine maintenance to stay up and running. By maximizing uptime, you’ll generate higher profits across the board from your landscaping projects.
Earth Auger Maintenance Basics:
- Transmission/gearbox: Every 30 days, or after 40 hours of use, verify the transmission oil level offers adequate lubrication. Low oil can cause excessive gear wear.
- Flexible Drive Shaft: Examine, clean and grease the flexible drive shaft after every 50 hours of operation. Apply sufficient grease so that it’s not gumming up the flex shaft but not so little that it’s dry and puts the cable at risk of breaking.
- Clutch: Check the clutch every 30 days or when you lubricate the flexible drive shaft. Clean the shoes and drums and replace if any clutch padding is missing. A worn clutch can slip or cause the drill to jerk. Worn springs might result in the auger spinning at idle or overheating.
A Comprehensive Approach
While these are the most frequent maintenance areas, it’s important to keep other components on your radar, as well. Be sure to monitor other parts, including the throttle, torque tube, augers, points and blades, and the engine to identify any potential issues.
To learn more about warning signs and maintenance tips, check out our online service videos. They offer step-by-step guidance on Little Beaver maintenance protocols. You can find further advice in our product manuals as well as our blogs.
You can also contact us directly regarding any technical issues. Our dedicated support team is just a click or phone call away.
Last updated Mar 27, 2026
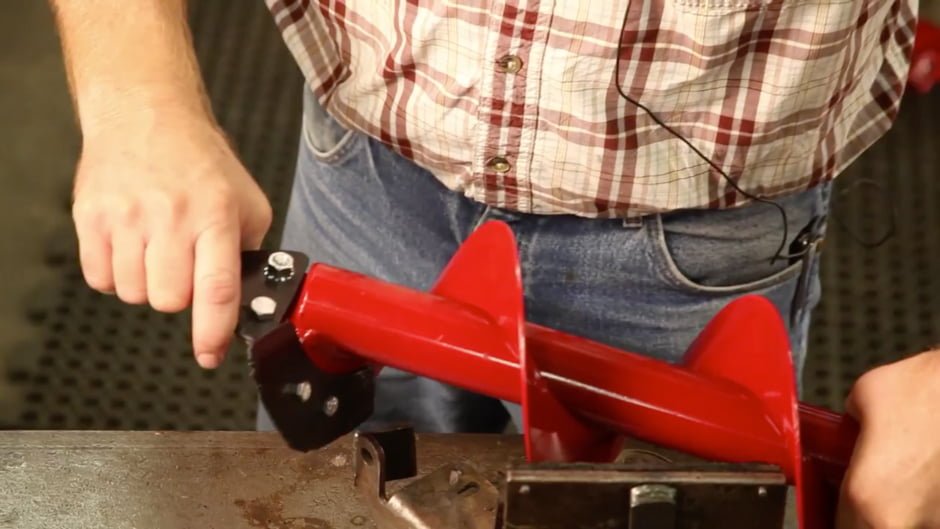
Mechanical Earth Drill Maintenance
When using an earth drill to install fence posts, deck footings or landscaping, a well-maintained machine is key to ensuring productivity. Mechanical earth drills have many moving parts and some simple maintenance goes a long way toward keeping you up and running with every drill component in top-notch shape.
Completing routine, preventative maintenance allows you to achieve the most uptime for your hole-digging projects and keeps your drills moving along.
Preventative maintenance starts with checking wear parts.
1. Transmission/Gearbox
Check the transmission oil level every 30 days or after 40 hours of operation.
Problem Indicators: Inspect the transmission or gearbox immediately if it begins making unusual sounds or experiences extreme heat. An operator can detect extreme heat if they smell burnt oil or feels warmer than usual. Unusual sounds and heat are the first problem indicators, and if ignored, the motor might start to lock up when in use. This could be a sign of low oil. If you spot oil leaks along the top of the transmission, around the bottom seal and the lower output shaft, check the fluid in the gearbox and change the oil if necessary.
2. Flexible Drive Shaft
Examine, clean and grease the flexible drive shaft after every 50 hours of operation.
Problem Indicators: Replace the shaft housing if there are deep cuts or torn wire braids in the rubber casing. Replace the core of the flex shaft if you find broken wires, sharp kinks or if the motor runs and the gearbox will not turn. Doing so ensures the shaft will function properly. Also remember to use caution when applying grease — excessive grease can gum up in the flex shaft, reducing the shaft’s life. Not enough grease can dry out the cable, which will break easily or generate enough heat to burn through the outer housing. If you hit too many hard objects, like rocks, it will result in helixing of the flex shaft. This damage can cause it to lock up or diminish performance.
3. Clutch
Check the clutch every 30 days or when you lubricate the flexible drive shaft. Clean the shoes and drums and replace if any clutch padding is missing.
Problem Indicators: The clutch slipping or the drill jerking while it’s running is a problem indicator. A clutch will continue to run even if no more clutch padding exists, which causes a weaker performance when engaging the auger and accelerating the engine from idle to full speed. If the auger spins at idle or overheats, this might also indicate that the clutch springs need replacing. Also check the bearing in the clutch drum after replacing the flex shaft. Make sure it’s loose and turns easily. A clutch drum that does not turn easily will lock up and cause the clutch to slip.
4. Other Wear Parts
- Throttle: If the speed and power of the drills seem a little off and the throttle lever doesn’t pull smoothly, try adjusting the throttle wire to minimize slack.
- Torque Tube: Before each use, inspect the torque tube for cracks. And always check that the spring-button attachment is securely snapped into place and replace it if it’s bent or broken.
- Replaceable Points and Blades on the Auger: Look at the replaceable points and blades before and after drilling to ensure they’re not excessively worn and replace if necessary. Using worn blades eventually wears down the auger and may cause a tear or damage to the flighting, resulting in a costly repair or the replacement of the entire auger. Failure to replace blades or keep them sharp causes the drill point to taper, and become cone shaped and as a result, it won’t drill effectively.
- Engine Maintenance: Depending on the model, mechanical drills differ in the engine that powers them. However a good rule of thumb is to check the engine oil level daily and change every 50 hours or annually. Change air filters every 25 hours or annually. Air filters protect the internal engine parts from dirt. Dirt can cause wear to the intake system and contaminate of the oil, which reduces the engine capability. In dusty conditions, clean and maintain the engine wear parts more often. Refer to the engine manufacturer’s instructions for proper procedures and recommended fuel and oil.
For safety reasons never operate drills with damaged or missing parts. If you have a maintenance issue or question, check out Little Beaver’s online parts and operators’ manual and online service videos or contact us for in-house technical consultation.
Last updated Mar 27, 2026
Hydraulic Earth Drill Maintenance
It’s easy to neglect little things we should do each day, like eating breakfast, drinking enough water or flossing our teeth. We tell ourselves it’s not a big deal if we forget, but doing so affects our overall health in the long run.
The same goes for hydraulic earth drill maintenance. Since hydraulic drills withstand extra tough conditions and have few moving parts, we assume we don’t have to worry about checking them often. But misuse and irregular maintenance significantly impact the health of a drill.
Neglecting hydraulic drill maintenance can lead to declined performance or, worse yet, a complete breakdown during hole digging projects. Keep your drill healthy by paying attention to these hydraulic wear parts.
1. Hydraulic Fluid & Motor Oil
Before starting the engine, check that the power pack’s hydraulic oil reservoir is filled to the top of the sight gauge. Keep the hydraulic oil and return line filter clean at all times, and change both after the first 15 hours of operation. From then on, change the filter and oil every three months or after 100 hours of operation.
Along with the hydraulic fluid, check the engine crankcase oil levels and ensure that all nuts, fasteners and fittings stay tight. A loose engine or tank mounting bolts can cause premature wear.
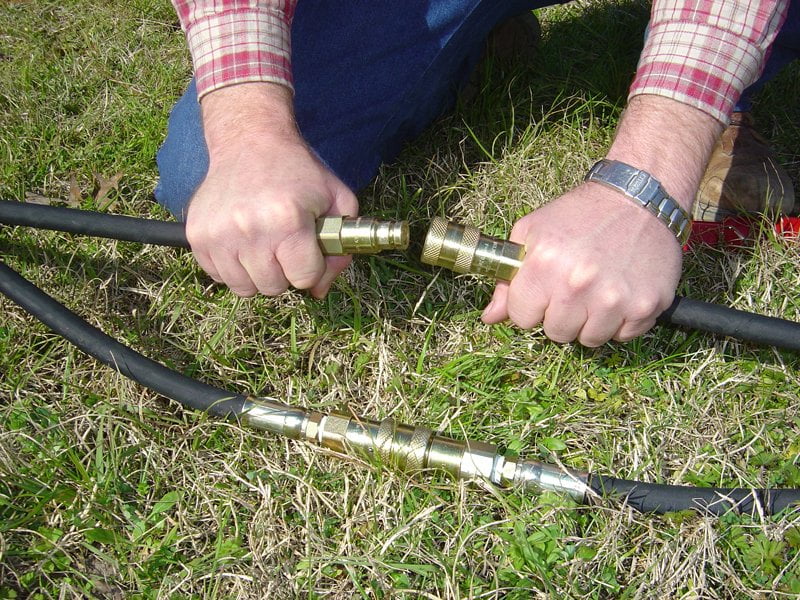
2. Quick Disconnects & Hoses
Regularly clean the hoses’ quick disconnects before and after drilling. After a job is complete and you begin to take the drill apart, attach the disconnect from the drill’s hydraulic output hose onto its input coupler and vice versa on its power pack. This prevents dirt from getting inside the hydraulic system. If one of the quick disconnect fittings begins leaking, the quick disconnect coupling needs replacement.
Examine hydraulic drill hoses and pipes for leaks, cracks and abrasions and replace if necessary. Keep hose connections tight and fitted for optimum performance.
3. Other Wear Parts
- Replaceable Points and Blades on the Auger: Your earth auger’s points and blades need replacement if dull or worn. Always check before and after drilling each hole. If a worn blade isn’t replaced it might damage the auger flighting, which requires either a costly repair or a total auger replacement.
- Torque Tube: Inspect the tube for cracks before each use. Check that the spring-button attachment is securely snapped into place and replace the attachment if it is bent or broken.
- Control Valve: If operators encounter any hydraulic oil leakage, they should shut down the power source and relieve the hydraulic pressure by moving the control valve in both directions, which opens the hydraulic oil flow. Tighten the screw-on fittings on the end of each hose. Replace the related hose assembly if the leakage continues. If the control valve leaks around the spool shaft, replace the seal kit.
When putting drills away for the off-season, remember that proper storage contributes to overall maintenance. Drain the gas or put recommended additive in the fuel, whichever the manufacturer suggests. Always store the drills in a dry place because the steel components will eventually rust if left outside or in places with a lot of moisture, such as propped up outside against a building.
Regular maintenance prolongs the life of your digging equipment, boosting your productivity and efficiency. If you have a maintenance issue or question, make sure to reference Little Beaver’s online parts and operators’ manual, online service videos or contact us for in-house technical consultation.