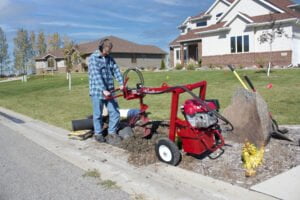
Using an Earth Drill to Install a Mailbox Post
If you’re wondering how to install a mailbox post, you’re not alone. Mailbox installation is a very common do-it-yourself (DIY) project many homeowners take on. For the least labor-intensive option, we suggest renting an earth drill to get the job done. Using an earth drill, like Little Beaver’s mechanical or hydraulic earth drill, will not only be more efficient than alternative methods, it will also reduce the strain on your back and other potential injuries.

What You’ll Need:
- Little Beaver earth drill with an auger 3 times
wider than the post - Mailbox post (we suggest a 4×4-inch wooden post or
two-inch diameter steel or aluminum pipe) - 50-pound bag of concrete
- Mailbox
- Bricks or stone for landscaping (optional)
After gathering the necessary items, we suggest starting by calling 811 to mark buried utilities and checking the manufacturer instructions that came with your mailbox model. Once you have your Little Beaver earth drill rental, make sure to read the owner’s manual or work with your rental center to learn how to operate the drill. Once you’re ready to go, watch our easy set-up video to see the step-by-step process for setting up the drill and disassembling it for transportation. You can also contact the Little Beaver team with any questions!
Per USPS guidelines, a mailbox should be placed six to eight inches back from the curb and 42 inches off the ground. Once you’ve found the right spot, you can start a pilot hole using the earth auger. This is a small hole drilled into the ground to help guide the larger drill for a more precise drilling location. Once the pilot hole has been created, it’s time to put the earth auger to work! After you’ve drilled to your desired depth, typically 20-24 inches, simply lift the auger from the hole and you’re ready for the next step!
Although it’s possible to install a mailbox without concrete, we suggest taking this extra step for improved security and durability. After preparing a bag of fast-setting concrete, place the post in the hole and pour the concrete into the hole around the post. Make sure to allow a few inches of space at the top of the hole and use a level to double-check that the pole is straight. If it has shifted, adjust quickly before the concrete dries.
After the concrete has set, it’s time to attach the mailbox to your post! Most manufacturers have their own instructions for how to get this done, so we recommend following those closely. Once the mailbox has been attached, don’t forget to add your address. If your mailbox is on a different street than your home, USPS requires that you put the full street address on the mailbox.
Even though your mailbox is technically complete after adding your address, you can always go a step further by landscaping around the mailbox before returning your earth drill to the rental center. Earth drills have many uses, including DIY landscaping such as planting small shrubs around your mailbox post.