Last updated Mar 27, 2026
Optimize Cutting for Drilling Projects
Matching the ideal point and blade to the soil and digging project can eliminate premature wear while reducing maintenance and boosting satisfaction for rental customers.
Unlike many manufacturers that only make one auger, Little Beaver offers a variety of augers, points and blades designed to optimize cutting in any soil for any project. Here’s a quick guide for setting your customers up for success.
Determine Auger Strength
Standard augers are excellent for a majority of projects and excel in soft soils. Little Beaver’s standard augers can also be used in clay, frozen ground and for drilling through hardpan soil. However, the tips and blades should be changed to match the conditions.
For drilling in rocky soils, always recommend heavy-duty augers to avoid damage. These augers are equipped with a more durable tooth and side cutting blades as well as heavy-duty flighting.
Diameter & Depth
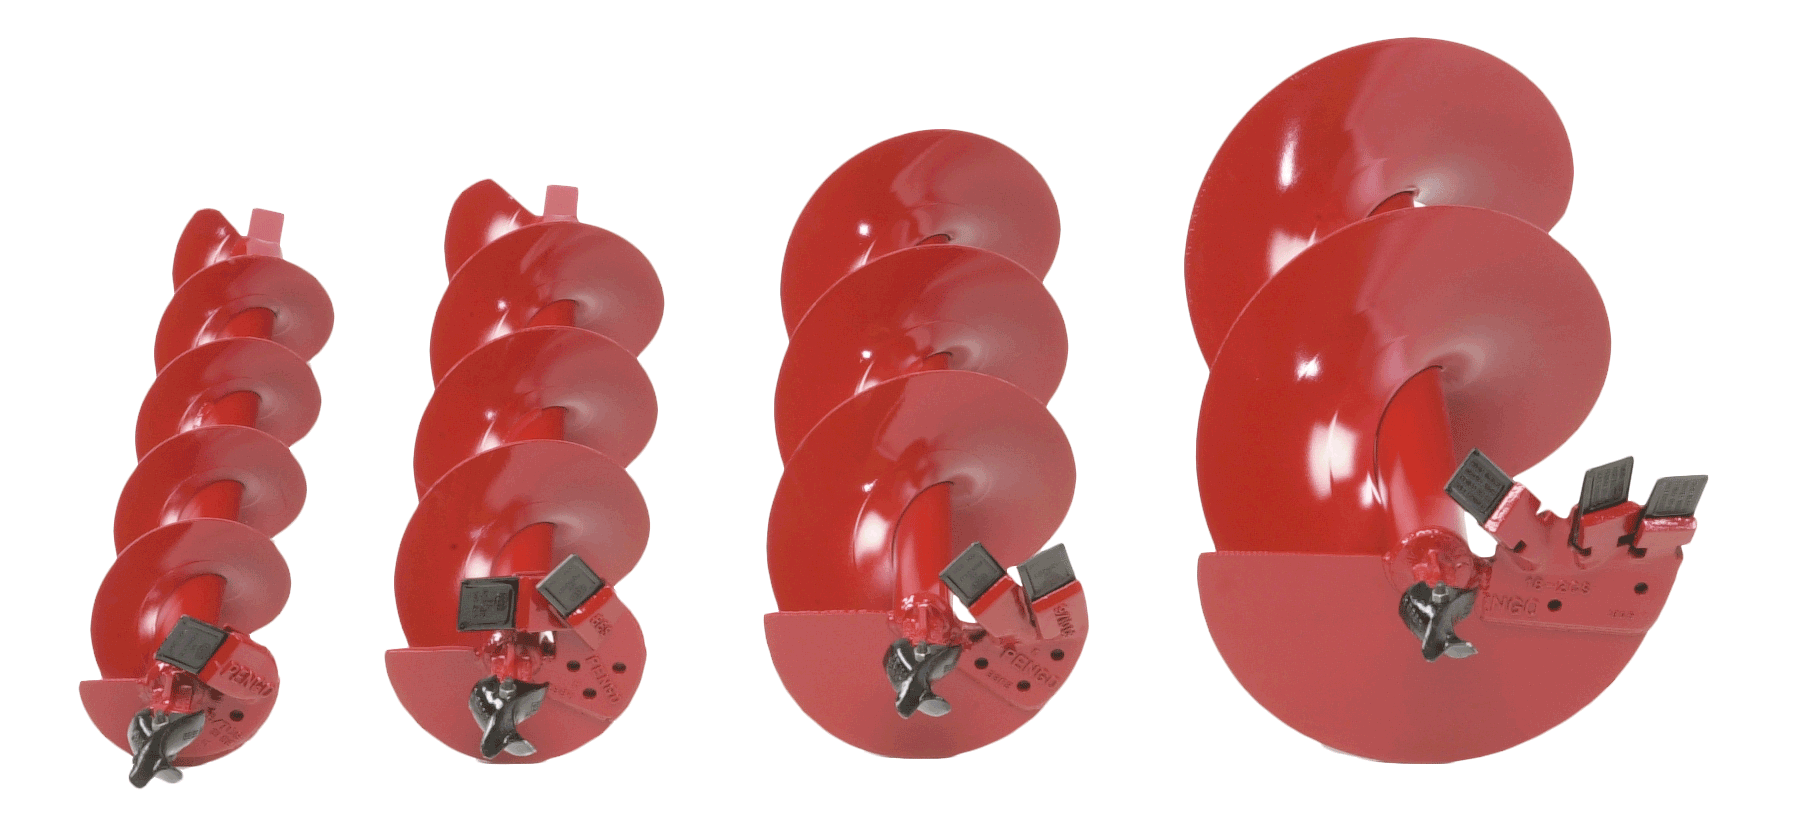
Little Beaver offers 13 different auger diameters, from 1.5-inch diameter augers used for soil sampling, to large 16-inch nursery augers. As the diameter increases, more power is required from the drill. Setting customers up with a drill that has a gear reduction will result in more efficient drilling when using large diameter augers.
For projects that require digging deeper than standard augers allow, Little Beaver offers snap-on extensions available in both full-flighted and tube versions.
Points and Blades
Six different blade options are available to meet any drilling condition. The standard blades and points are ideally suited for loamy soils or areas with few rocks. They are made with cold-rolled steel and hard surfacing to their edges.
To drill through hard clay or frozen ground, Little Beaver’s carbide blades are more effective. For abrasive soils and compacted rock, Little Beaver’s heavy-duty augers are specially designed with heavy-duty steel and carbide blades and tips.
Convenient Components
Little Beaver’s snap-on augers and extensions use convenient spring-loaded snap buttons, allowing customers to switch augers quickly without needing tools.
Most Little Beaver points and blades attach to the auger with two easy-to-remove steel bolts. Little Beaver points and blades can easily dig more than 100 holes before requiring maintenance. Reversible blades are also available. These can be flipped over for a fresh cutting edge to last twice as long as regular blades. Need help picking the right augers, points and blades for your jobs? Connect with our Little Beaver experts today.
Last updated Mar 27, 2026
4 Tips for Building the Perfect Fence
You’ve become an expert in landscaping throughout the region. From planting trees and flowers to installing decks and curb edging, you’ve completed many projects for satisfied customers. Now it’s time to step up your game and add fence installation to your services.
Let these fence-building tips lead you to success.
1. Get Answers.
Start like you would with any project, by working with the homeowner or business owner to establish the size, scope and specifics of the project. To do this, always have a set of questions ready that will get to the heart of the project. What kind of fence does the customer want? What will the layout be? Where do they want gates? How high should you build it?
Check with city building codes and, if applicable, neighborhood association rules, so that the fence specs meet all of the codes. If the city assessor has not surveyed the property recently, you’ll want to coordinate that to ensure the fence is built in the proper location and, depending on the area, you may need a permit. Call 811 a few days prior to digging to have utility companies mark underground utility lines, gas pipes and sprinkler systems.
2. Get Your Tools.
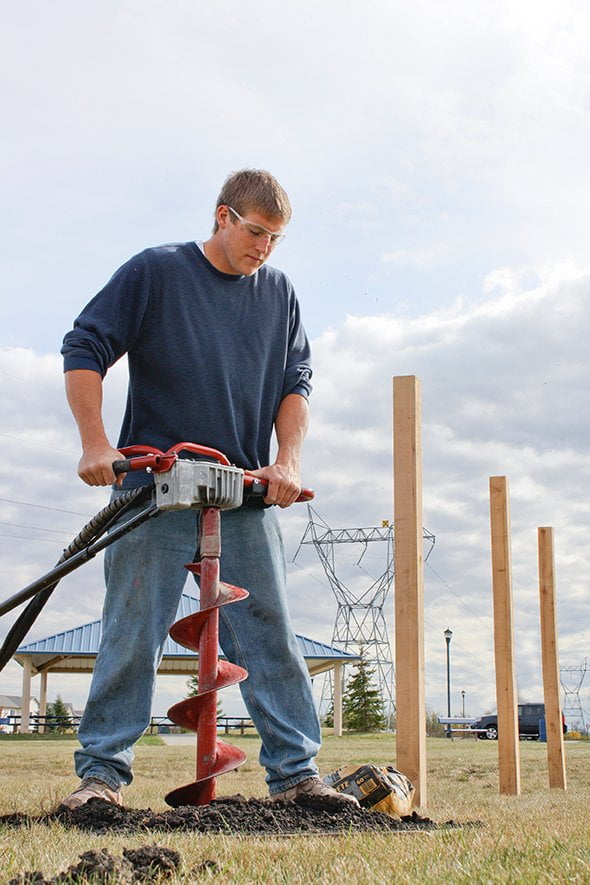
Selecting the right hole digging equipment will help you finish on time and on budget. If it’s a small project, you might use a hand-held posthole digger. If you’re doing more than a dozen holes, though, it will be slow work to muscle each hole clean. To tackle bigger or multiple projects, you’ll want the speed and ease-of-use that comes with an earth drill. A Little Beaver mechanical one-man or hydraulic drill can bore each hole in less than a minute with little effort. It’s equally important is to make sure you select the correct auger, points and blades for the soil type you’re working in. This will help you dig holes faster with less pain.
3. Get it Straight.
You can’t get a straight fence without evenly spaced holes and firmly set posts. Set the spacing by marking and digging all corner and gate post holes first. Run a string from corner to corner and then measure the post spacing along the line.
For chain link fences, space postholes no more than 10 feet apart. For wooden fences, posts usually stand 6 to 8 feet apart. If installing posts in soft soils or windy areas, use a hand posthole digger to flare out the hole, creating a bell shape for more stability. The hole diameter needed is based on the size of the post used. For instance, a 4-by-4 post requires an 8-inch diameter hole. This can be easily achieved with Little Beaver’s snap-on augers that range in diameter from 1.5 to 16 inches. Holes are typically 24 inches deep, but you’ll need to ensure the depth is 3 inches below the frost line to prevent posts from cracking in the frozen ground. In some parts of the northern U.S. and into Canada, that means going as deep as 4 feet. If you’re in windy areas or sandy soil, you may want to dig your posts even deeper.
4. Get the Concrete.
Position the posts so that they are the correct height and plumb; even the slightest lean can create a slanted and potentially unstable fence. Next, shovel concrete into each hole. Avoid touching the post, which could cause it to move. Choosing concrete rather than a dirt and gravel mix will give the fence better stability. Allow 24 hours for the concrete to set, and then attach the chain link fabric or wood framing and face boards. With both types of fences, complete the gates last.
Once you’re done, it’s an ideal time to touch base with your customer on fence maintenance and landscaping recommendations. A job well done here can translate to more work, whether from this customer or referrals, as you continue to expand your landscaping services.
Feel free to contact us for further fence-building tips; or general questions on our full line of augers, one-man earth drills and two-man earth drills. We’re always happy to provide the tools and assistance you need.
Last updated Mar 27, 2026
How Our Auger Blades and Points Slash Maintenance Costs and Reduce Downtime
High-maintenance machines can be a real headache when you want to maximize uptime. That’s why it’s important to have the right equipment well-suited for whatever task and sediment you’re working with. Matching the ideal point and blade to the specific soil type minimizes premature wear, maintenance costs and labor. Unlike manufacturers that only make one auger blade, Little Beaver produces a variety of augers, points and blades. The components are designed for optimizing your ability to cut through a variety of soil profiles.
Our replaceable blades and points mount on our regular and heavy-duty snap-on augers with ease. They protect the earth augers from wear while drilling in material that ranges from loamy soil to compacted rock. Since drilling a bunch of holes in the ground can be time consuming, here are a few ways we make it easier.
Ease of Use, Low Maintenance
“We want to keep our customers drilling without interruption,” said Little Beaver President Joe Haynes. “We designed our blades and points for simple replacement on our signature snap-on augers so operators can focus on digging and quickly change out parts when they become dull or worn.”
The standard blades and points come with every Little Beaver snap-on auger. They fasten to the auger with two steel bolts, which operators can easily remove with a crescent wrench. Made with abrasive-resistant steel and hard surfacing on their edges, these components are ideally suited for loamy soils with few rocks.
Equipped with Little Beaver blades and points, an auger can drill more than 100 holes in prime soil conditions before you need to service it. Our parts are easy to use and require low levels of maintenance — benefits that remain unmatched across the industry.
Rugged and Versatile
Smaller-diameter augers — 1-1/2-inch, 2-inch and 3-inch — use standard points that simply screw or pin on. For dense soils, we offer Little Beaver exclusive carbide blades that fasten to the bottom of snap-on augers. They cut hard clay and frozen ground into smaller pieces.
“Many operators keep both the standard and carbide blades on hand if they will be transitioning between multiple jobsites. It’s quick and easy to make the swap,” Haynes said. “Having both sets enables digging in a diversity of soil conditions. It also prolongs the lifespan of blades and augers.”
To take on the most challenging soil formations, Little Beaver’s lineup of heavy-duty snap-on augers use specially engineered, heavy-duty steel and carbide blades and tips for abrasive soils and compacted rock. They lock into larger-diameter augers with rubber locks, forming a tight wedge fit to cut through tough sediment without coming loose.
Let’s Make It Happen
Little Beaver’s commitment to innovation and versatility for customers makes its augers, blades and points a reliable choice for professionals in the field, enhancing drilling efficiency while reducing overall operational costs. We would love to collaborate on maximizing the value of your earth drilling operation. To learn more, give us a call at 936-327-3121 or fill out our online contact form and a member of our team will be in touch with you soon.